> For the complete documentation index, see [llms.txt](https://docs.daylite.app/help/llms.txt). Markdown versions of documentation pages are available by appending `.md` to page URLs; this page is available as [Markdown](https://docs.daylite.app/help/mac-fundamentals/opportunities/pipelines.md).
# Pipelines
A Pipeline in Daylite is a series of predefined milestones — called Stages — that an Opportunity moves through as you work toward closing a sale. Each Stage represents a milestone in the sales process, such as Inquiry, Proposal, or Negotiation. Each Stage can have Tasks and Appointments associated with it that get triggered when the Opportunity reaches that Stage. In Daylite, you can define multiple Pipelines that might apply to different products and services.
**Key facts:**
* A Pipeline is made up of one or more Stages, each representing a milestone in your sales process.
* Each Stage can have Tasks and Appointments that are created automatically when the Opportunity reaches that Stage.
* You can define multiple Pipelines for different products, services, or business workflows.
* Pipelines can be used with both Opportunities and Projects. When creating a Pipeline, you choose whether it is for an Opportunity or a Project.
* Pipelines are created and edited in `Settings > Pipelines`. Pipelines can only be created and edited from Daylite for Mac.
* An Opportunity must have a Pipeline assigned to appear on the Opportunities Board.
### Why Should You Keep Pipelines Simple in Daylite?
Although it can be tempting to create Pipelines with lots of different Stages and associated Tasks, simplicity is always the best approach.
For example, if you create a Pipeline with six different Stages and four Tasks assigned to each, that means twenty-four separate Tasks per Opportunity. This number only increases with each Opportunity you create. With so many Tasks being created, you will soon become overwhelmed and perhaps go numb to the Tasks by ignoring them. This negates the purpose of applying Tasks in the first place.
A balance needs to be struck around capturing the workflow through the Tasks you create for each Stage in order to successfully close an Opportunity, without being too detailed on every single step that needs to be taken.
### How Do You Create a Pipeline in Daylite?
Designing your own set of Pipelines that are aligned to your business workflows when you first start using Daylite is an excellent investment of your time, as it ensures everyone has a clear definition of what needs to happen during an Opportunity's lifecycle to bring it to a successful conclusion.
{% hint style="info" icon="lightbulb" %}
You can build multiple Pipelines for use with both Opportunities and Projects. This is useful when you have multiple offerings with very different workflows and associated Tasks. For example, if you offer both Photo Shoots and Retouching, each will require different work processes, so it might make sense to produce a Pipeline for each.
{% endhint %}
1. Navigate to `Settings > Pipelines` and choose the pre-supplied Opportunity Pipeline. You can edit these existing Pipelines to suit your business purposes, or create brand new ones by clicking the **+** icon.
2. Select **New Pipeline** and give it a name and description.
3. Choose whether this Pipeline is for an Opportunity or a Project.
4. Check the **Active** box so this Pipeline shows up in Daylite.
### How Do You Configure Pipeline Stages in Daylite?
Each Pipeline contains one or more Stages that represent the milestones an Opportunity moves through.
1. Select a Pipeline in `Settings > Pipelines`.
2. Rename each of the pre-supplied Stages and add a description that better suits your business.
3. Click **+ Add Stage** to create additional Stages, or delete Stages you do not need.
### How Do You Add Tasks and Appointments to Pipeline Stages in Daylite?
You can set Tasks and Appointments for each Stage in your Pipeline. Once all Tasks and Appointments have been completed in a Stage, your Opportunity will move onto the next Stage in the Pipeline.
To add a Task to a Stage:
1. Select a Stage within your Pipeline in `Settings > Pipelines`.
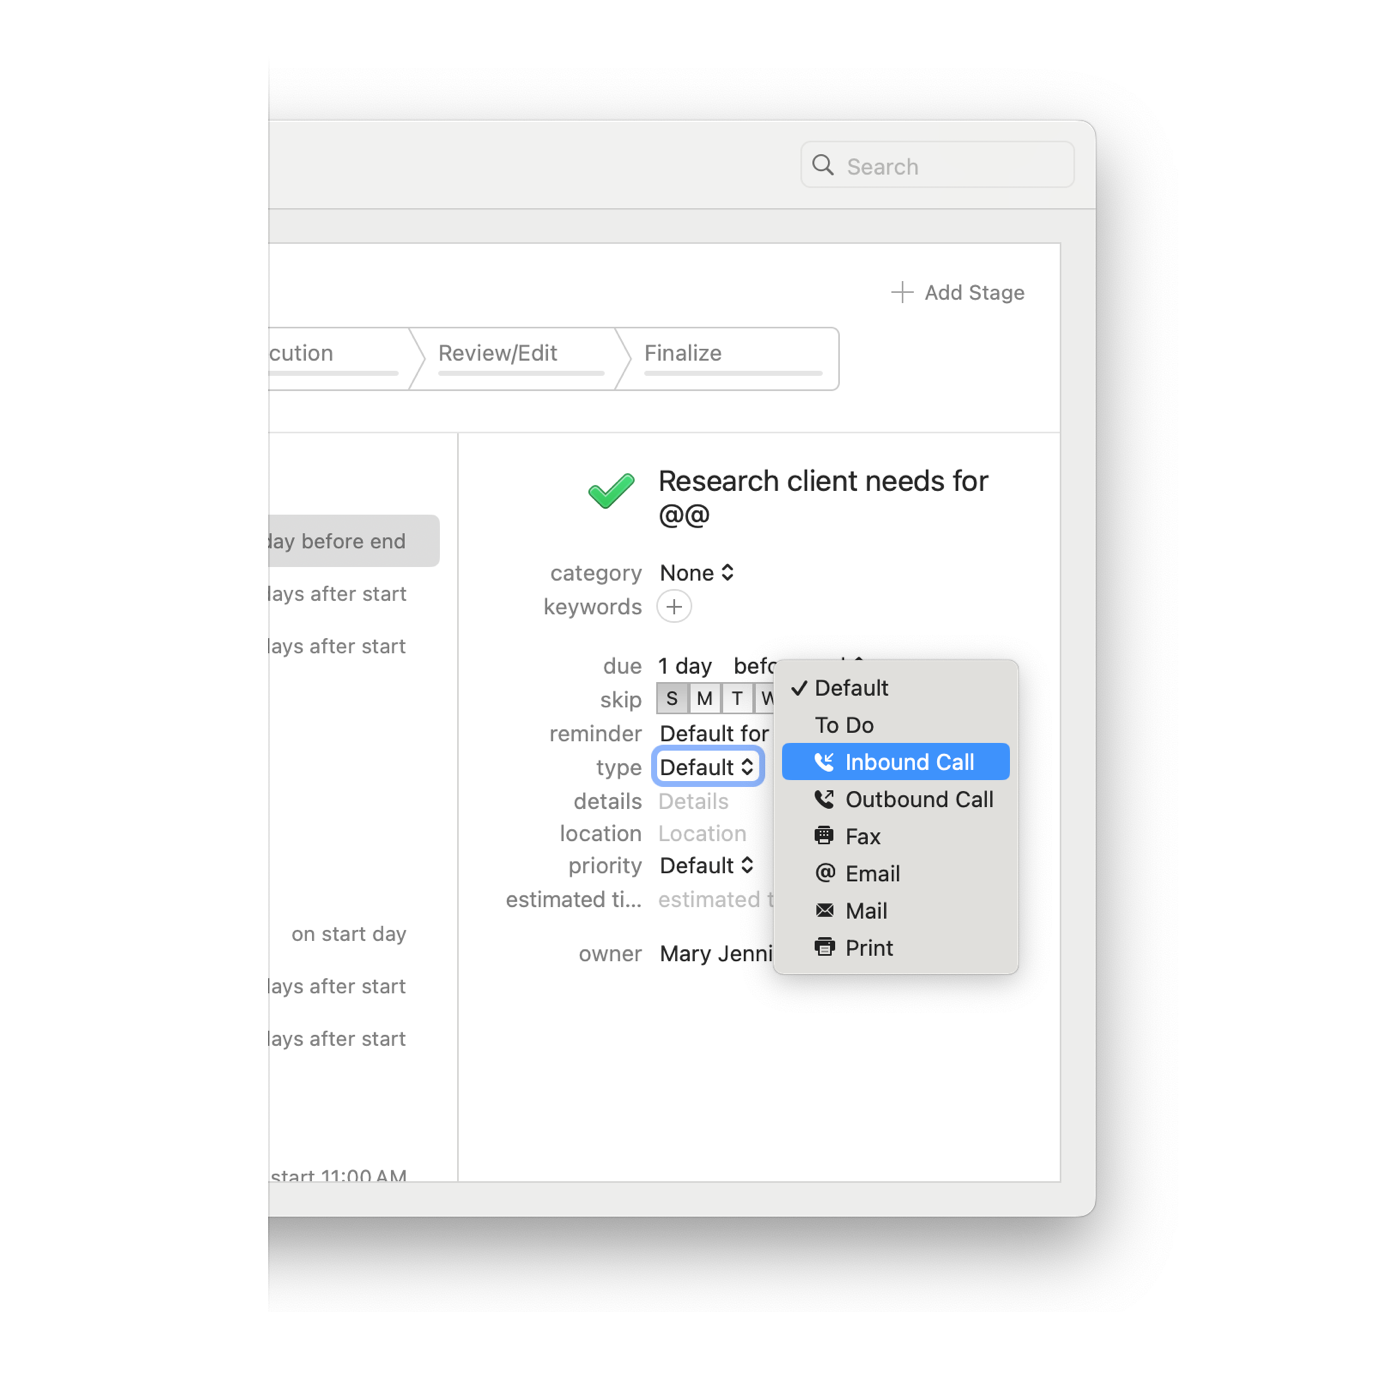
2. Click **New Task** to add a Task to that Stage. Click to edit.
The Pipeline Name shows the number of Stages and an icon indicating whether it is associated with a Project or an Opportunity.
#### Task Configuration Options
When configuring a Task for a Pipeline Stage, you can set the following:
* **Title** — Daylite substitutes @@ in the Task title with the name of the Opportunity to which the Pipeline is applied. Use this placeholder to create contextual Task names automatically.
* **Category** — predefined Categories make searching and filtering your Tasks much easier. You can even use emojis to make your Categories stand out.
* **Due date** — gives you an easy way to organize and view what needs to be done first. The due date can always be extended if needed. You can set the due date relative to the Stage:
* **After start** — a set number of days after the Stage starts (the most common option).
* **Before end** — a set number of days before the target end date. This lets you provide a target end date for the Task, and Daylite calculates the due date backward from there.
* **Reminder** — you can choose to set a Reminder for a certain number of days after the start date, or you can choose Default for Owner, which lets you set a predetermined due date for all new Tasks after the current date, triggering an automatic reminder.
* **Type** — provides a list of Task types. This list cannot be modified, which is why it should be used in conjunction with Category, and not strictly by itself.
* **Details** — add a description of what needs to be done, such as bullet points or instructions to complete the Task. Fill in as many details as possible.
* **Priority** — used to set the relative importance of the Task.
* **Estimated Time** — can be beneficial for time management. It can be used to display your Task list in order of estimated time, so if you only have an hour, you might choose Tasks that take 5 to 10 minutes to complete.
* **Owner** — the default Owner is set to the current user, but this can be changed so Tasks are allocated to a specific user. For example, if a certain staff member is responsible for confirming appointments with customers, you could allocate Confirmation Call Tasks to that user.
To add an Appointment to a Stage, click **New Appointment** and configure it with the same due date and detail options.
### How Do You Set a Default Pipeline in Daylite?
You can set a default Pipeline that is automatically assigned to every new Opportunity. This prevents Opportunities from being created without a Pipeline, which would cause them to not appear on the Opportunities Board.
1. Navigate to `Settings > Pipelines` and designate the Pipeline you use most frequently as the default.
2. You can change the Pipeline on individual Opportunities at any time.
If your team includes users in different departments, you can set different default Pipelines per user. For example, a user in the Sales department may use a different set of Pipeline Stages than someone in the Marketing department.
### How Do You View Pipelines After Configuration in Daylite?
You can view your completed Pipelines, including all of their Stages, Tasks, and Appointments, in the **Tasks and Pipeline** view on an Opportunity record.
You can also view your Pipelines, including their Stages and Tasks, on the Opportunities Board. After creating or editing a Pipeline in Settings, close the Settings window and select the Opportunities Board. Choose your Pipeline — the Stages on the Board are an exact match for the Stages configured in Settings.
### Frequently Asked Questions
#### Can I use the same Pipeline for Opportunities and Projects in Daylite?
No. When creating a Pipeline, you must choose whether it is for Opportunities or for Projects. However, you can create similar Pipelines for each with tailored Stages.
#### What does @@ mean in a Pipeline Task title in Daylite?
@@ is a merge placeholder. When the Pipeline is applied to an Opportunity, Daylite replaces @@ with the name of that Opportunity. This creates contextual Task names automatically.
#### Can I edit a Pipeline after Opportunities are already using it in Daylite?
Changes to Pipeline Stages and Tasks apply to new Opportunities or new Stage transitions. Existing auto-tasks on Opportunities already in a Stage are not affected retroactively.
#### Where can I view Pipeline Tasks on an Opportunity in Daylite?
Open the Opportunity record and select the **Tasks and Pipeline** view to see all Stages, their associated Tasks and Appointments, and their completion status.
#### How do I prevent Opportunities from missing the Board in Daylite?
Set a default Pipeline in `Settings > Pipelines`. All new Opportunities will be assigned this Pipeline automatically, ensuring they appear on the Opportunities Board. See The Opportunities Board for details on Board requirements.
---
# Agent Instructions
This documentation is published with GitBook. GitBook is the documentation platform designed so that both humans and AI agents can read, navigate, and reason over technical content effectively. Learn more at gitbook.com.
## Querying This Documentation
If you need additional information that is not directly available in this page, you can query the documentation dynamically by asking a question.
Perform an HTTP GET request on the current page URL with the `ask` query parameter, and the optional `goal` query parameter:
```
GET https://docs.daylite.app/help/mac-fundamentals/opportunities/pipelines.md?ask=&goal=
```
`ask` is the immediate question: it should be specific, self-contained, and written in natural language.
`goal` is optional and describes the broader end goal you are ultimately trying to accomplish on behalf of the user. GitBook uses it to tailor the answer towards what is most useful for that goal.
The response will contain a direct answer to the question and relevant excerpts and sources from the documentation.
Use this mechanism when the answer is not explicitly present in the current page, you need clarification or additional context, or you want to retrieve related documentation sections.