Loading...
Loading...
Loading...
Loading...
Loading...
Loading...
Loading...
Loading...
Loading...
Loading...
Loading...
Loading...
Loading...
Loading...
Loading...
Loading...
Loading...
Loading...
Loading...
Loading...
Loading...
Loading...
Loading...
Loading...
Loading...
Loading...
Loading...
Loading...
Loading...
Loading...
Loading...
Loading...
Loading...
Loading...
Loading...
Loading...
Loading...
Loading...
Loading...
Loading...
Loading...
Loading...
Loading...
Daylite is a highly customizable application with a wide range of capabilities to make it easy for you to simplify your work life so your small business runs smoother. With centralized management of all its capabilities, Daylite helps to keep you productive, organized and focused.
Daylite is designed to work on all your Apple devices; whether you have an iMac, a MacBook, an iPad or iPhone. It may look a bit different on your iPhone than on your MacBook, but rest assured you will get the same great experience, as Daylite syncs your information across all your devices.
This tour of Daylite will give you a basic overview of the iPhone app, and how to find the information you need quickly and efficiently.
When you open the Daylite app for the very first time, you are presented with a blank slate. So where do you begin?
Why, at the beginning of course.
When you open the Daylite app on your iPhone you are presented with five different Tabs along the bottom of your screen. Each of these Tabs are considered an important part of Daylite, as they are usually seen as an important part of your business day. As such, they are easily accessible.
Your Tabs will change.
As you move through the All Tab on the right hand side of your screen, your Tabs will update to include the Object you are viewing. As an example, if you tap the All Tab and choose Opportunities, it will then show in your Tabs.
Therefore your Tabs could include:
Today
Notifications
Calendar
The only Tabs to remain fixed in place are the Today screen and the All Tab.
The Today screen is designed to help keep your day organized, and shows you everything you have planned for the day at a single glance. The Today screen gives you an overview of your work day, your Task list, and your upcoming work week.
At the top of the Today screen you will find the + New Object button, which lets you create new Objects from one convenient location. Tap this button to create a:
New Appointment
New Meeting
New Task
By placing all of your email accounts in one convenient location, but keeping all of your email accounts separated within that location, Daylite allows you to easily add new People as Contacts, and save a copy of any emails that are sent and received in that Person’s history.
You can also add new Tasks and Appointments, or information such as Companies, job titles, phone numbers, addresses and more, by editing the Contact’s information right from within the Daylite app.
You can set reminders for upcoming events, which will show in the Notifications tab. If you set a reminder for the Task in the Contact's Details it will alert you at the appointed time.
If the Notifications tab is not currently showing, you will still get a reminder alert which appears as small orange circle over the All Tab.
Daylite overlays your business and personal calendars in one easy to access location. Any changes you make to these calendars are updated automatically, so no matter if it's a business luncheon, or your child's socccer practice, you will always arrive on time.
My Calendar is shows your daily, weekly and monthly Calendar events.
All Calendars lets you view, create, and edit different team member Calendars. It is important to note that the user name changes based on the Calendar selected, and you can only view one Calendar at a time.
You can also choose to show Tasks, Objectives, Birthdays, Anniversaries, and Resources for each Calendar.
At the heart of every successful business are the relationships you build with your clients. As such, a customer's Contact information is of paramount importance.
Contacts are divided into People and Companies, and Daylite keeps both safe and accessible, no matter which device you are on.
Every person you meet is an Opportunity that could lead to that life long client. Daylite lets you sort and filter your Opportunities by names, dates, keywords and more, which means you can stay on top of your Opportunities with the tap of your finger.
All of your Opportunities can be found in the All Tab.
They are divided into three different sections.
This is a truly unique feature of Daylite. It offers a customizable view of each of your Opportunities and where they are at every Stage of your Pipeline. You will know exactly what needs to happen before moving to the next Stage, so you can accomplish your goals.
This displays every open Opportunity you are currently working on.
Selecting an Opportunity allows you can see which Stage it is in, and if you tap the > on the right side of the Deal, you can edit the Pipeline and the Stage that the Opportunity is currently in.
By tapping the Edit button you can add valuable details to the Contact record.
This view allows you to see all of your Opportunities, whether they are Won, Lost or Suspended. This is a great way to review, update, and pursue Opportunities that may have fallen by the wayside.
Daylite places all your Projects in one convenient location, with three different ways to view that information.
The Projects Board creates a top down approach, where you can choose your Pipeline, and view where each one of your Projects are, and at which Stage they are sitting. You can tell at at glance if any of your Projects have been sitting for too long, and what needs to happen before they move to the next Stage.
This view shows all Projects with your name attached as the user. This can be either a Project you have created or one that has been delagated to you.
You can see what Stage your Project is at, it's Category and Status. It let's you create New Tasks, Appointments, Notes, Forms and Files, and finally, it shows you any linked Items attached to the Project. All of these items can be edited by tapping the Edit button.
Although it may look identical, this view shows you every Project you have worked on, regardless of it's Status. This could be useful if you need to find an abandoned Project from a year ago that may need to be revisited.
The Tasks section is grouped into Inbox, Worklist, My Tasks, Someday, Categories, Keywords, Delegated, and Done.
The Tasks Inbox gets Tasks off of your mind quickly by adding them to your Inbox until you have time to categorize them later.
The Worklist is designed to help you focus on what needs to be done right away. It helps to think of it as your "priority" list. You can add a Task to the Worklist by checking the Pin in your Tasks Inbox or My Tasks Details pane. This Pin will show as filled in orange when you are viewing your Worklist, which indicates the Task has been moved successfully.
My Tasks will show you every Task that you have set for yourself, including those with Subtasks, which will be highlighted in orange next to the main Task in your list. Each of these Tasks are grouped under their respective Project.
If you have not assigned a due date to a Task then it wil be filed under Someday. If you update this Task with a due date, or pin it to the Worklist, the Task will be moved automatically to the appropriate folder.
Delegated Tasks have been assigned to a different user on your Team. These Tasks can be viewed here, giving you oversight on Task completion.
Once a Task has been marked as completed, it is moved to the Done folder.
The Details View shows information about your Contact, which may include things like Category and Keywords. These are useful when you want to search by phone number, address, the Project or Opportunity they are associated with, or who the account belongs to. These details can be altered to reflect your business needs by clicking the Edit button at the top of the Details View.
As an example, you could navigate to All Tab > Contacts > People, and find your Details View.
The Activity View shows every interaction you have had with the Contact to date. These activities could include email correspondences, follow-ups, reminders to send proposals, meeting notes and calendar appointments. The Activity View lists all these interactions chronologically by time, day and year.
Daylite's Search for the iPhone is located in the All Tab, and once used, will appear in your Tabs until replaced my more recent Objects. It is designed to look through all of Daylite for any mention of what you type. This means even if you do a partial search, Daylite will display Contacts, emails, Tasks, Appointments and more with that information.
You can use Sort to display information the way you find most convenient. This feature changes depending on what Item you are looking at:
First Name
Last Name
Category
Name
Category
Name
Forecasted Date
Create Date
Priority
Name
Due Date
Create Date
Priority
Opportunity and Project
Due Date
Category
Keyword
Selecting the Filter button presents you with options to filter your search based on, depending on the Object you have selected, Category, Keywords, Status and Priority. These filters help narrow your search, as you can set multiple filters at the same time.
You can link People to a New Company, or add them to an existing Company by selecting + Add Link from the LINKED ITEMS section of the Contact record.
You can also link People or Companies to a People record in the same manner.
Add Roles and Job Titles to that Person, link any emails or correspondence you have had, and fill in any details you like, all of which are searchable.
Setting up Daylite to look, feel and act the way that works best for you is crucial to your overall workflow. By customizing Daylite Settings you are setting yourself up for success.
Settings can be found by scrolling down to the bottom of the All Tab.
Here are a few essentials to help you get the most out of your Daylite experience.
Setting > Help is arguably once of the most important things to know. After all, if you have a question, you need an answer. Between the Help Center and Getting Started, you are in good hands.
Managing your team has never been easier thanks to the Settings > Users menu, which is found here. You can add' users, delete accounts, and see which invites are still pending.
For more information on this feature, check out .
Set your other Calendars to show in Daylite, or show your Daylite Calendar in other apps. Don't forget to let Daylite know what day of the week to start on.
By customizing your Categories and Keywords, you will be able to identify, label, and search for your Contacts quickly and easily. Be sure to avoid unnecessary duplication, and be as precise as you can to avoid confusion.
Roles and Relationships form the very core of your business. Not surprisingly, it's the core of Daylite as well.
Daylite can help you organize your day, your business, and your life. Thanks to its intuitive structure, you can add that important Person to Contacts, check when your next Appointment is coming up in Calendars, and create Tasks and Notes so you never forget an important point during a call or meeting. All of these features, and more, tie together to guarantee your business runs smoothly.
For more information on setting up Daylite Mail Assistant, please refer to
For more information on how to capture a Contact from an email, please refer to
How many email accounts do you have?
If the answer is more than one, you are not alone. Many of us have multiple email accounts, for both work and personal use. Juggling multiple email accounts can be a challenge, especially when it comes to your business.
Have ever found yourself looking back through those accounts, trying to locate key details about a client interaction, or been left frustrated as you try and locate a conversation thread that you can't find anywhere?
Daylite can help.
By placing all of your email accounts in one convenient location, but keeping all of your email accounts separated within that location, Daylite allows you to easily add new People as Contacts and save a copy of any emails that are sent and received in the Person’s history. You can also add information such as Companies, job titles, phone numbers, addresses and more, by editing the Contact’s information right from within the Daylite app.
Opportunities
Projects
Tasks
Category


Add your email account to Daylite to send, receive, and manage your email right in Daylite.
Adding your work and personal email accounts to Daylite is easy, and by keeping each account separated, you avoid the confusion of which account is which.
To set up Daylite Mail for the first time, select Mail from either your existing Tabs or the All Tab, then tap Add Mail Account. Select which mail account you would like to add.
You will now be able to see each account added separately to Daylite Mail under Accounts.
That's it!
You have successfully added your email accounts to Daylite.
At first glance Daylite's Mail feature may seem deceptively simple. After all, there are many apps that separate emails into their respective folders.
But let's take a closer look at what Daylite is really doing.
Start by selecting Mail, then choose an email account.
The screenshot below shows an email with grey numbers next to the date the email was sent. These indicate an email thread exists, and how many emails are a part of the thread.
The yellow Sunshine icon shows that an email Contact has been successfully added to Daylite.
A greyed out Sunshine icon lets you know that there is at least one email Contact in the thread has been added to Daylite. You must open this thread to add additional email Contacts if needed.
A paperclip icon shows you there is at least one linked Object attached to this email Contact.
A file card icon means the intended recipient of the incoming email has a Daylite record.
A small square lets you know there is at least one Task attached to this email Contact.
A small clock face lets you know there is at least one Appointment attached to this email Contact.
If you would like to add an email Contact to Daylite, simply tap Add to Daylite.
This email Contact has now been added to Daylite, and will be highlighted in orange going forward.
By tapping the Edit button beside the orange highlighted In Daylite, you can quickly add:
Category - You can only choose one Category to display. A good way to use Categories is to indicate the type of activity involved. For example is it an email, a phone call, or something you need to do in the office?
Keywords - You can choose multiple Keywords to display. These are used to help create filtered searches.
Permissions - Who is allowed to view these records?
Linked items - Connect related information together.
You can add a New Task to this Contact record by tapping the New Task button. From any email that requires a follow-up or a next action, simply create a Task and it will be linked to the email and the Person who sent it. Then you can review your Tasks any time you want to, either from the Contact's Activity View or from the My Tasks section of Daylite. Be sure to add a due date and reminder to your Task so you don't forget about it.
You can attach a New Appointment to this Contact record by tapping the New Appointment button. This Appointment is then viewable in your Daylite Calendar. The email and the Contact will be linked to the Appointment, making it easy to review the details of your Appointment later.
Once you have added the email Contact to Daylite, you can view and edit this Contact record by tapping their name. This will open up their Contact record in the Details View. Select Edit to make any changes.
Here are a few important things to note when viewing a Contact's details:
When you select Add to Daylite the email is linked to the Contact. You can choose to unlink the email at any time.
A client may have multiple emails just like you do. Be sure to add them here.
You can adjust Permissions so only certain people or departments on your team have access to this record if needed, such as Human Resources.
Link any Opportunities the Contact is involved with. You can view the Opportunity by tapping here.
Relationships can be either hierachy based (work environment), such as David has an assistant named Stephen, or equality based (personal) such as Toby is the brother of Susan.
Linking Linking gives you the ability to connect related information together, sharing the knowledge between two pieces of data. For example, you may have several Contacts at a single Company, or have multiple Contacts linked to a single Project.
When you add an email to Daylite from or to a Daylite Contact, that Contact's currently active Project and/or Opportunity will be automatically linked to the email as well. If the Contact has multiple active Projects or Opportunities linked to them, those Projects or Opportunities will be shown as suggested links, and you can click the ones you want to have linked to the email.
The Activity View is a great way to see everything about your Contact all at once. The Activity View keeps track of all your linked Emails, Appointments, Tasks, Files, Notes and Forms, and displays them in chronological order.
Adding an email to Daylite you're about to send is a quick and easy process, and is encouraged because then you have a record of any outgoing correspondence in one easy-to-view location.
Once you have composed a new message and have added all of your recipients, the outgoing email message can be automatically added to Daylite. This can then be seen under the Activity View. Any Daylite Contacts will be automatically linked to the email.
Daylite Mail's Settings lets you set Mail Accounts, your default Sender and Signature, it lets you set up your Toolbar, and to Ask Before Deleting, just in case.
There are however three other very important features to highlight. They are Compose in Apple Mail, Linking, and Email Storage.
Compose in Apple Mail - Any emails you compose outside of the My Mail tab will open in Apple Mail.
Linking - When a message is added to Daylite, you can choose to:
Link All Contacts
Link Opportunity
Link Project
Link Users
Email Storage - this is really important depending on whether you are most often in office or out on the road. You can choose to:
Optimize Storage - great for in office, as email is downloaded as you need it, and the originals are stored in Daylite Cloud.
Download All Email Content - All emails and content are stored on your device, so you have access even when offline.
Daylite Mail perfectly blends of all your email accounts under one easy to use umbrella.
Add brand new email contacts to Daylite with the tap of a button, or let Daylite automatically add incoming and outgoing emails to your Contact's history.
You can link a Contact's email to an upcoming Appointment or Meeting, add a File or a quick Note, and keep a chronological record of all those interactions regarding Oppoortunities and Projects in the Contact's history, including emailed correspondence.
All from one location.
By definition, filtering your customers and prospects means dividing them into groups based on shared characteristics. By grouping your customers and prospects under similar interests, you can tailor your communications to seek out new business or market to your existing customers.
The idea is that if you can group, and then target common characteristics, it may result in higher conversion rates, increased customer loyalty, and ultimately, higher revenue for your business.
In Daylite, you can use filters a number of different ways.
What sort of a Contact you are viewing will dictate what sort of filters you should apply. As an example, when looking at a People Contact you could choose to filter by:


Client
Employee
Freelance
Prospect
These are just a few types of Categories you could create and then apply, based on your business needs.
However if you were looking at a Company Contact you would be able to filter for Categories such as:
Agency
Vendor
Client
Prospect
As with the People Category, you can create and then apply filters that are specific to your company use.
Every major Object in Daylite has got it’s own separate list of Categories.
Categories can be customized by you in Settings > Categories.
There is no limit to the number of Categories you can create, but you can only choose one to represent the Object. For example you could select the Category of a company to be a Prospect or a Client but not both.
You can have a unique Category list for each of Object in Daylite. People, Companies, Appointments, Tasks, Groups, Notes, and Emails can each have separate Category lists.
A Category can be applied to more than one Object in Daylite. For example, the Category Personal could be applied to People, Companies, Appointments, Tasks, or Notes in Daylite.
You can assign different colours to your Categories.
By selecting Settings > Categories you have the ability to set Categories for any Object you require.
When you select the + sign to create a brand new Category type, Daylite shows you a list of all of the Objects you can assign a Category to. Care should be taken to only select the Object types that are relevant for the specific Category.
For example, If you want to add a Category Type called Employee for the People Object in Daylite you must make sure that this Category does not appear in other places where it is not relevant. Make sure that you uncheck the Daylite Objects that are not needed.
Click the + to create a new Category.
Choose a colour for your Category.
The Active Box is always checked by default. Deselect if necessary.
Select the Objects that this Category Applies To by checking the boxes on the right hand side.
That’s it, you have created a new Category!
Keywords are a second means of filtering information in Daylite. They can be customized as needed in Settings > Keywords.
Keywords can be applied to more than one Object in Daylite, and there are no limits to the number of Keywords you can create.
Sometimes you may find that specific Keywords simply do not apply to your use of Daylite. We would encourage you to de-activate any Keywords that are not appropriate, as this will make your Daylite system more efficient and remove any potential confusion. To do this, select the Keyword you wish to de-activate, then tap the Active Button to off.
Keywords are referred to as Tags because you can apply multiple Keywords to an Object.
They are applied to an Object in Daylite from a pre-defined drop-down list.
You can only choose one Category, but you can select as many Keywords as you like.
It is not possible to assign colours to your Keywords.
Try not to let your Keywords multiply out of control. After you have been using Daylite for some time you may find that your list of Keywords has become unmanageable. This can make it difficult to find the right Keywords to use, which in turn may discourage you from using Keywords altogether.
We would recommend prefacing similarly themed Keywords such as when describing where your Leads are coming from:
Lead Source: Website
Lead Source: Word of Mouth
Lead source: Introducer
Lead Source: Existing Client
In this way all similar Keywords will cluster together in a list.
Do not use the same naming convention for a Category and a Keyword.
De-activate or delete Categories and Keywords that do not apply to your business.
Avoid making Categories and Keywords available for all Objects when editing.
Avoid duplication.
Categories can have a colour. Try to ensure that each list of Categories has a unique, distinctive colour, such as red for Clients, or yellow for Vacation.
Review all your Categories and Keywords on a regular basis to ensure they are still relevant for your needs.
Although we have only really looked at Categories and Keywords, based on selecting a People or Company record, you will find that your Filters will change based on which Object you are currently looking at.
For example, under My Opportunities you could filter for a Category and Keywords, however under All Opportunities you could also filter for a State.
My Tasks and Someday let you apply filters for Category, Keyword, Status, and Priority.
When applying a Delegated filter, you will see Owner, Category, Keyword, Status, and Priority.
By learning to use Filters effectively, you can stay more organized and gain new insights about the People and businesses in your Contact list.
So much can happen all at once, and it's easy to forget when something is due. Missing deadlines can increase your stress, tarnishes your reputation and stops you from reaching your goals.
Once you create a Task and assign a due date, Daylite will encourage you to view your upcoming Tasks and make sure you always meet your deadlines.
The first thing you will need to do is assign a due date when either creating a new Task, or when you are editing an existing one.
Daylite groups all of your upcoming Tasks in one convenient location, no matter what kind of Task it is.
Select the Today Tab to view all of your Tasks chronologically. These will include past due Tasks that still need to addressed, Tasks that are due today, and any upcoming Tasks.
As you know, some Tasks are a higher priority than others, and should be attended to first. This is accomplished by marking the Task with a Worklist Pin, which places it in a specific Task folder called Worklist, which appears at the top of your Today list.
Once a Task is done, it is important to mark it accordingly. There is always a sense of accomplishment when a Task is finished, why not commemorate it with a check mark?
Placing a checkmark next to a Task removes it from the Today list, and places it in the Done folder. These Tasks can still be edited if necessary.
Daylite helps you focus on the future and feel less stressed over looming due dates by staying on top of them.
Now you're ready to create reminders for those due dates so you can get notified when things need to get done in
Sharing your Daylite Contact list with other apps lets you work cross functionally more efficiently, because when you share your Daylite Contact list with other apps, you can also take advantage of the features the other apps offer.
Sharing your Daylite Contacts allows you to see them in other apps, so you can add, edit, or leverage your Contacts even when you're working outside of Daylite.
Here are a few examples of things you can do by sharing your Daylite Contacts:
Daylite works well for a single person, but when used with your team, you really start to see the difference. With everyone on your team using Daylite, processes become streamlined, and everyone works together better.
When you add someone to Daylite, you invite them to your account by email. Only a Daylite account owner can invite team members to Daylite. After an invitation is accepted, you are charged based on the amount remaining in your billing cycle.
Invite your team to Daylite and take your business further.
Choose Settings and select Users.
Add your Office 365 account to Daylite for the iPhone.
Tap Mail on the toolbar
Tap Add Account
Next, select Office 365 from the list of account types.
As you begin to use Daylite to its fullest extent you will notice your team beginning to work more efficiently. However, it may not make sense for everyone to have full access to your database. Employees for example do not need to see confidential HR records.
Daylite lets you control who can see or edit information.
Every business has sensitive information. That's why you can apply permissions to individual items in Daylite.
There are two types of permissions:
View: Only those with View Permissions on an item can see an item they don't own. Denying view permissions is useful when items should only be seen by managers like employee reviews, or meeting minutes between the executive team.
Following up with your Contacts is one of the most important aspects of building stronger relationships with them. Without an effective method of following up you risk losing customers, as they feel they aren't being responded to in a timely manner.
Don't let those important follow-ups slip through the cracks. Using Tasks in Daylite to create follow-ups and follow-up schedules helps keep you in touch with your clients.
When you view a Person or Company, you can create either:
Where is most of your business coming from?
What source gives you the best leads, or has the highest conversion rate?
If you’re not tracking your lead source, you won’t know what to ramp up, what to focus less on, and where there’s opportunity ripe for the picking.
With Daylite you can track where your deals are coming from, use tools to analyze which sources are working and which ones aren't, so you can make better decisions, and spend more time focusing on higher generating sources.
In Daylite, you track your deals by creating New Opportunities.


Use your iPhone and iPad camera with business card scanners.
Make phone calls with Siri.
Add Daylite Contacts to Mail's VIP list.
Import Contacts to Daylite from other contact lists.
Sharing your Daylite Contacts on your iPhone and iPad lets you do things like make calls with Siri, or add contacts with a business card scanner on your iPhone and more.
By following these steps, you can create a separate Daylite Group in your Apple Contacts app. Your Contacts in Daylite are reflected in Apple Contacts, which means your Contacts in both apps will always be up to date.
Navigate to Settings > Contacts.
Tap Install Contacts Profile.
You will need to grant permission to download a configuration profile from Marketcircle's website.
Navigate to your iPhone's Settings > Profile Downloaded and tap Install to create the Daylite Group in Apple Contacts.
Navigate to your Contacts app to find your merged Daylite Contacts.
Now Daylite is shared with the Contacts app on all your devices. With all of your Contacts in one place, Daylite helps you build more relationships, close more deals, get more done, and scale your business.
Want to share your Calendar with your other apps?
Check out Calendar Integration.
Choose Invite User.
Enter the email address of the team member you would like to invite to Daylite and tap Send Invitation.
The person you have invited will recieve an email with instructions to add them to Daylite.
Navigate to Settings > Users and tap Manage Users.
Your browser will open to the Daylite Account Manager. From here you can invite new users, check how many seats yoou have available to share, look at current users and who you are still waiting on to accept an invite, and how many users are currently inactive, meaning you can reassign these seats.
Daylite gives you the tools to add and manage your entire team more effectively, right from your device.
When prompted, tap Continue to allow Daylite to use the Microsoft Sign in
Microsoft will ask if you are trying to sign into Daylite. Select Continue.
Enter your App Specific Password
If your Office 365 account uses Multi-Factor Authentication (MFA), you will need to use an app-specific password to add your account. Please have a look at Microsoft's Learn More page for further details on this.
The Office 365 Admin will need to turn on app-specific passwords. Follow the steps below to turn on App-Specific Passwords
As an Admin, log into your Office 365 account
Click on the Admin button at the top right side under Apps
In the pane on the left, choose Users then click Active Users
If Preview mode is not enabled, then you'll need to select “Try the preview” at the top right corner to change views. You will need this to see additional options for this setup
Next to Export Users click the “…” button and choose Setup multi-factor authentication
Select the user and click Enable
Click enable multi-factor auth
Click your profile icon at the top right corner and select My Account
Then select Security & Privacy > Additional Security & Verification
Click Create and manage app passwords
Click Create and give the app a name (e.g. My Mail)
Click Next
Make note of the password generated or select Copy to clipboard
Click Close
This app-specific password can then be used when adding your Office 365 account to Daylite Mail If you experience any problems following along with the steps above, please contact us for more assistance.
Edit: Only those with Edit Permissions on an item can edit an item they don't own. Denying edit permissions is useful when you have a Project that only a project manager should edit, or if you are documenting important decisions that you wouldn't want changed.
Important:
You will need to set up Permissions on a desktop. Once you have done so, Permissions will be accessible on your iPad.
Choose Daylite > Preferences > Permissions.
Turn Permissions On.
When prompted to restart Daylite click OK.
Select an item in Daylite and click Edit.
Scroll down until you see Permissions, then select Public, Private, or an appropriate permission, then tap Save.
When editing Permissions, you will see the view and edit permissions for each person on your team as well as two presets: Public and Private. These permissions let you quickly allow or deny, view, read, and edit permissions for everyone.
Public: Anyone can view and edit this item.
Private: Only the owner can view and edit this item.
Give your team one place to store all their information, while making sure that the information is still sharable with the right people and teams.
A follow-up Appointment
Either of these creates a Task or Appointment that is linked to the Person or Company.
Tasks and Appointments are both great at managing follow-ups because Daylite will remind you when they are due, show that they are overdue, and they will stick around until you mark them as complete.
Locate the Contact and select the Activity View.
Scroll down to All Activity, then tap either My Tasks or New Appointment.
Pro Tip:
Building stronger relationships with your clients often means staying in touch on a regular basis, but sometimes it's hard to remember to check in with all your clients all the time. By setting a series of reminders for each of your follow-ups with just a couple of clicks, Daylite will do the remembering for you.
Once you have successfully created a new Task or Appointment named Follow Up, you will be able to see this them listed chronologically in your Contact's Activity View.
Setting consistent Follow Ups for Tasks and Appointments will help you build better relationships with your clients. Let Daylite remind you to follow up, and you can focus on the work at hand.
Want to learn more?
Check out the article Stop Things Falling through the Crac
Here are a few examples:
Referral
Trade Show
Social Media
From the menu bar on your Mac, select Settings > Opportunities.
Choose Opportunity Types and then tap the + sign and type the name of the source.
Be sure to to mark the source as Active.
Now, when you create a New Opportunity on your device, be sure to tap Type, and then select the source. You can also add Type to an existing Opportunity by tapping Edit in the top right corner.
By tracking your lead types, you can identify which sources are generating the most new business. These insights can help you make informed decisions about where your greatest sources of business are coming from, and how to capitalize on that knowledge.
When you don't know how many deals are in your Pipeline, it's difficult to know whether you need more deals to meet your goals or if you're taking on too many.
Whether you're a salesperson or a manager, Daylite helps you organize all your open deals so you can see how many you or your team have.
When you know how many open deals are in your Pipeline, you can manage your workload more easily. Daylite's Opportunities Board lets you view all the deals in each of your Pipelines, so you can stay organized and focus on what's important.
Select the Opportunities Board from the All Tab, then tap the Pipelines filter to select the Pipeline you want to view.
The Opportunities Board also lets you filter your Opportunities by:
Owner - Select the Owners filter to view an individual salesperson's Opportunities, or choose All Owners to see your team's deals all at once.
Forecasted Close Date - Tap on the Forecasted Date filter to view Opportunities that are forecasted to close by a certain date, such as next week or next quarter.
Creation Date - Tap on the Create Date filter to view Opportunities that were created within a certain date range.
Categories - Tap on the Categories filter to view Opportunities by a single Category at a time.
Keywords - Tap on the Keywords filter to view Opportunities by a single Keyword at a time.
Types - Tap on the Type filter to select Opportunities that were generated the same way, such as a trade show, social media, or inbound call.
By accurately tracking your deals, you can start to forecast sales demand and measure your workload. Daylite's Opportunities Board helps you see at a glance how many deals are in your Pipeline. As a manager, you can expand this by looking across your entire team, as well as individual sales people.
Sharing your Daylite calendar with other programs lets you work cross functionally, and more efficiently. With your Daylite calendar available in other apps, you can take advantage of the features they offer as well.
Daylite makes it easy to share your calendar with the Calendar app on the Mac, iPhone, and iPad.
Sharing your Daylite calendar allows you to see your appointments in other apps, so you can add, edit, or leverage your calendar even when you're working outside of Daylite.
Pro Tip:
Sharing your Daylite calendar with another program's calendar application DOES NOT merge the databases together. When you share your Daylite calendar, each database is kept as its own calendar group.
When you share your Daylite calendar, you create a unique app-specific username and password. This allows you to securely connect your Daylite calendar to other applications, like Apple Calendar, without using your main account credentials.
Log in to
Select Integrations
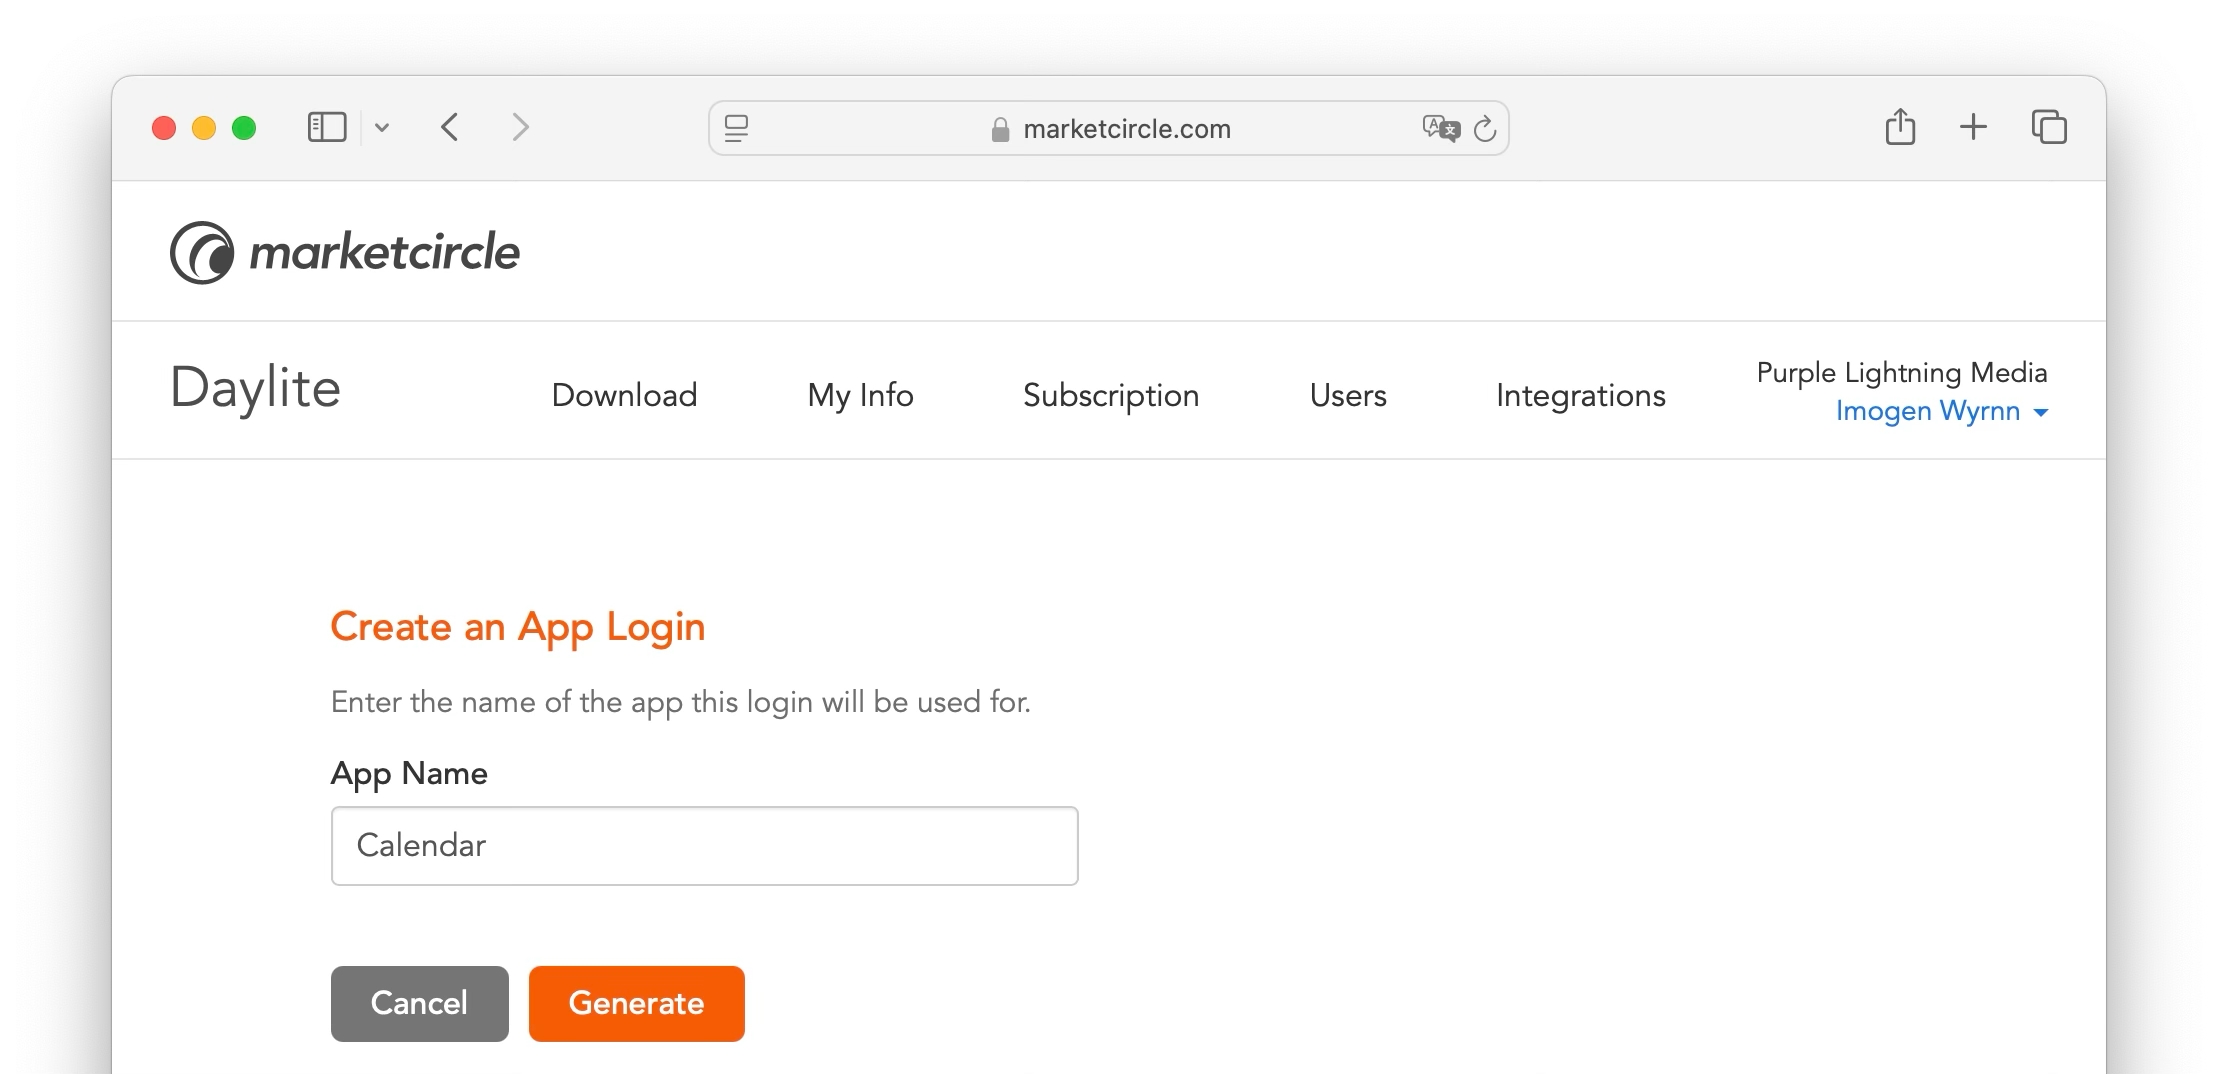
Click + New App Login.
Once completed Daylite will generate a unique username, password, and provide you with a server address. Use these to add your Daylite calendar to a CalDAV-compatible calendar application.
Each time you share your calendar, a new set of credentials is generated. These credentials are specific to your device and application, meaning they won’t affect your main Daylite login. If you need to remove access or update your setup, you can manage these credentials from your Account Manager.
Open Settings > Apps > Calendar
Tap Calendar Accounts > Add Account
Choose Other
Tap Add CalDAV Account
Navigate to Settings > Calendar on your iPhone.
Tap Default Calendar and select your Daylite account.
Daylite uses CalDAV, a standard protocol supported by many calendar applications. This means you can add your Daylite calendar to apps like Fantastical, and BusyCal.
Most CalDAV-compatible apps will require your server address, app-specific username, and password, which you can generate in your Account Manager under Calendar and Contact Integration. If a port number is required, use 443.
Refer to your calendar app’s documentation for specific setup instructions.
With Daylite shared with the Calendar app on the Mac, iPhone, and iPad, you are well on your way to building more relationships, closing more deals, getting more done, and scaling your business in ways you never could before.
Want to share your Daylite contacts with other apps too? Then check out , and get ready to take your business to the next level.
Creating a seamless experience for our users has always been at the heart of Daylite, no matter which device you are on. By integrating all of your calendars into one app, Daylite lets you plan your day efficiently, without looking elsewhere.
By adding calendar accounts from other apps, and then selecting the specific calendars you wish to view in Daylite, you are creating a fluid experience, and a more organized approach to your day.
Navigate to Settings > Calendar > Show Other Calendars in Daylite.
Sharing your Daylite Calendar allows you to see your appointments in other apps, so you can add, edit, or leverage your Calendar even when you're working outside of Daylite.
Sharing your Daylite Calendar with other programs lets you work cross functionally, and more efficiently. With your Daylite Calendar available in other apps, you can take advantage of the features they offer as well.
Daylite makes it easy to share your calendar with the Calendar app across all your devices.
Pro Tip:
Sharing your Daylite Calendar with another program's calendar application DOES NOT merge the databases together. When you share your Daylite Calendar, each database is kept as its own calendar group.
Here are a few examples of things you can do by sharing your Daylite Calendar:
Add, edit and delete meetings from outside Daylite.
Use Siri to make new appointments.
Create reminders with Siri and the Reminders app.
On the Daylite Home Screen navigate to Settings > Calendar and then tap Show Daylite Calendar in Other Apps.
Tap Install Daylite Calendar Profile.
Navigate to your iPhone's Settings > Profile Downloaded and then select the Daylite profile and tap Install.
The next time you open your iPhone's Calendar app you will see your Daylite Calendars in a separate Daylite group.
Navigate to Apple Settings > Calendar > Default Calendar and tap Default Calendar, then select your Daylite account.
Thanks to Daylite Calendar integration, you don't need to jump between calendar apps any longer. Now you can focus on your work and let Daylite remember the details for you.
Want to share your Daylite Contacts with other apps too?
Then check out , and get ready to take your business to the next level.
The ability to switch your focus while juggling multiple Projects at once may seem like "just another day at the office", but if you sometimes feel like you are scrambling to keep track of all those details, the delay can be costly.
Daylite helps connect all those moving pieces, so even with long-term Projects, you can remember what you have done, who is currently working on parts of a project, and any decisions that have been made.
Daylite helps you keep a history of emails, Notes, Tasks, and Appointments that are attached to a Project. This is done by Linking these items to a Project.
Your Project's entire activity history loads immediately, keeping you organized so you can find what you need in a just a few seconds.
As an example, here is a Project called Amrita Puja Project. It has already been filled out so you can see:
The Project Name
The Project Details
The Activities linked to the Project
The People and Companies linked to the Project
When creating a brand new Project, you can add Items to by linking them to the Project.
You can also edit an existing Project, adding Items over time, as the Project evolves.
Each Item you add, whether it's an Email, a Task, a File or just a quick Note, can be viewed under Activity. You can also view People and Companies that are involved with the Project under Linked Items.
Every Project is unique, and always seems to end up having a long list of files attached to it: specs, contracts, pictures, spreadsheets, and more. By attaching them directly to a Project, Daylite ensures you don't ever have to scramble for a missing file again.
Select the desired Project from either My Projects or All Projects, then tap New File and select the file you want to attach to your Project.
Daylite lets you sort and filter your Projects quickly, so you can find that key pice of information at a moment's notice.
Sort your Projects by:
Name
Due Date
Create Date
Priority
Filter your Projects by:
Status
Category
Keyword
Every Item in the Activity list has a distinctive icon to indicate what type of Activity you are looking at. This serves a key function, as these icons act as visual cues, letting you locate the Activity you need even more readily.
Organize all the moving pieces of a Project to track it's status, know who is working on what, and capture all the important decisions and details. Now that your Projects are organized, it is time to begin and achieve your goals sooner.
How much time do you spend each day trying to keep things from falling through the cracks?
Last minute meetings, alarms you thought you set that don't go off, or due dates that creep up on you.
Daylite takes that stress away by helping you remember everything you need to accomplish, thanks to better visibility and easy-to-set reminders that keep you on task.
Navigate to My Tasks and tap the + button to create a New Task.
Tap on Due, then using the date picker, choose when the Task is due.
When you set the due date, your default Task reminder is automatically applied. In most cases, that's it, you're done! If you need to, you can change the reminder, such as the time of day you want to be reminded, or add a second one.
When a Task comes due, it appears in the Sidebar under Notifications.
Tap on Notifications and you will see a Reminder with the name of your Task.
You can choose to Snooze the Reminder for a period of time, or Dismiss the Reminder if it has been dealt with.
The Today tab is your personal dashboard for the upcoming day and week. Any Task or Project that is due today, overdue, or has a due date within the next week will show up here.
You can also show upcoming due dates on the Calendar. This will help prioritize Tasks, and is a fabulous visual reminder of anything that may need your attention.
To show Tasks on your Calendar that have a due date select the Calendar you wish to display, then tap Tasks and Objectives.
Going forward, you will see your Tasks shown in the selected Calendar. Tap the Task in order to view it within your Daylite Calendar.
By setting Reminders for important to-dos, reviewing the Today screen daily, and using the Calendar to track upcoming Tasks, you will be able to keep things from falling through the cracks and set yourself apart from the competition.
Now you're ready to start in a Project and make your business run smoother by .
Add your iCloud account to Daylite for the iPhone.
Tap Mail on the toolbar
Tap Add Account
Next, select iCloud from the list of account types.
Enter the email address of your iCloud account. Daylite requires you to create an app-specific password. This is a different password than the one you use to sign into iCloud.
Sign into your associated with your iCloud email address.
Choose Sign-In and Security from the Apple Account menu, then select Account Security to enable Two Factor Authentication. If you need more detailed instructions, follow .
Once Two Factor Authentication has been enabled, select App-Specific Passwords.
Click Generate an app-specific password.
Enter "Daylite" for the name of your App-Specific Password, then choose Create.
Copy the App-Specific Password that has been generated and paste it into the Password field in Daylite. Click Next to finish adding your iCloud account to Daylite.
The first thing that probably springs to mind when considering importing data is “how do I get all of my business contacts and other information from my old system into Daylite”. There is no denying that importing a Contact’s details is really important, and the last thing you want is to lose any of their information.
Your Contacts are at the very centre of your business. Importing your Contacts from other contact management applications should always be a straight forward process. Whether you are importing from Apple's Contacts, iCloud, Google, or any other format, Daylite makes that process easy.
Adding a new Contact to Daylite is incredibly easy. Whether you are meeting a client in your office, attending a trade show for a weekend, or even working from home, the process of adding a brand new Contact record is identical. You can choose to add a brand new Contact to Daylite by selecting Contacts > People or Contacts > Companies and then tap the + button and select either New Person or New Company.
You also have the option to import an existing Contact record into Daylite by selecting either Contacts > People or Contacts > Companies from the New Object menu, then tapping the + button and choosing Import from Contacts App.
Select from the Choose a Category menu and then tap Select Contacts.
Choose the Contacts you wish to import. You can choose more than one at a time. These Contacts will be added to Daylite as a brand new record.
Pro Tip:
It is important to be concise to avoid errors. Try to remove any duplicated data from your Contacts app before importing it to Daylite.
With your Contacts now in Daylite, you can start exploring the interface and see how Daylite can take you further. Keep up the momentum and, then start and with other apps.
If you would like help with importing from another major contact manager, CRM, or contacts spreadsheet we'd love to pair you with one of our
Sales cycles can get very complicated. People come and go, documents are created, decisions are made, then updated, and then changed again.
Daylite organizes all those moving pieces so you can work faster, make fewer mistakes, and close more deals.
Daylite lets you keep a history of emails, meeting minutes, files, and documents on all your deals. This is done by linking items to an Opportunity so you can reference notes from a call, search for an email, or find an important file like a document or image.
When viewing an Opportunity, you can link a New Task, Appointment, Note, Form, and File directly to that Opportunity. This is useful when you're on a call with a client, in a sales meeting, or planning how you want to approach the deal.
You can also link a Person or Company to the Opportunity, such as the CEO, or decison maker, another team member or another Company record involved in this Opportunity.
You can also link a new or existing Person or Company to the Opportunity you are viewing.
When you create a new Opportunity, or are viewing an existing one, tap + Add Link, select either a Person or Company, and then type the name of the Contact you wish to link to the Opportunity. This could be a business Contact, a business the Opportunity works at, or a team member assigned to the account.
Linking a file to an Opportunity helps you stay organized. These could include sales decks, contracts, pictures, spreadsheets, and more.
Select the Opportunity and tap New File.
Tap Choose File and navigate to the file you want to link.
Organize all the moving pieces to your Opportunity so you can track the status of a deal, find out who is working on what, and locate all of the decisions and details. Now that you are organized, it might be time to start so you can achieve your goals sooner.
Add your IMAP account to Daylite for the iPhone.
Tap Mail on the toolbar
Tap Add Account
Next, select Other IMAP from the list of account types.
Enter the email address and password of your email account.
Enter your Incoming Mail Server and Outgoing Mail Server information, as specified by your your email provider.
Microsoft Exchange Account If you are adding a Microsoft Exchange account, you will need to contact your email administrator or email service provider to ensure IMAP is enabled, and to provide you with the server settings.
If you are the administrator of your Microsoft Exchange account and need assistance configuring IMAP, refer to Microsoft's .
The ability to track your Close Rate is an integral part of the sales process, as it helps you identify areas of opportunity for increasing sales.
For example, if you know your Close Rate is currently sitting at 30%, and your goal is to land three new clients this quarter, this tells you that you need ten more deals in the Pipeline to make that goal.
It is important to change the State on the Opportunity when a deal closes, regardless of whether you won or lost the deal.
Locate the Opportunity and tap Edit.
Select the state field and choose from the drop down list.
Tap Save and then Done when finished.
When you choose a State for your Opportunity you can also explain the reason for your choice. These are called Opportunity State Reasons, and can only be set up in Daylite Preferences.
Navigate to Daylite > Settings > Opportunities.
Select Opportunity State Reasons then tap the + button.
Name your Opportunity State Reason and choose a State.
By tracking your Close Rate, you can make better decisions about forecasted sales, how many leads you need in the Pipeline, and track improvement in your sales performance.
For assistance creating a New Opportunity, check out
Add your Gmail account to Daylite for the iPhone.
Tap Mail on the toolbar
Tap Add Account
Next, select Gmail from the list of account types.
Keeping track of your deals can be hard.
This is especially true when you are working with multiple accounts and long sales cycles. So much can happen at any moment and you really can't remember it all. So how do you organize all your deals, and how do you keep track of what stage they are in?
Daylite's Opportunities Board makes it easy to track all your deals at once. It allows you to view all of your Opportunities in a Pipeline by Stages, so you can see at a glance where all of your deals are at.
Pipelines need to be created in Daylite Settings on your Mac first, and Stages are added to each Pipeline. Once completed, you will be able to view them in the
Add your AOL account to Daylite for the iPhone.
Tap Mail on the toolbar
Tap Add Account
Next, select AOL. from the list of account types.
Following up on emails, phone calls, and conversations between you and your client is critical to your success, but how effectively do you actually keep track of these essential components? Trying to remember all the points made during a phone call verbatim, or writing down the highlights on a scrap of paper doesn't really do the trick.
Daylite makes capturing, tracking and sharing communication an easy, straight forward process. Whether it's an email, a phone call, or a face-to-face conversation, you can use Daylite to capture the details.
One of Daylite's most unique and powerful abilities is to capture emails straight from your inbox, which makes capturing, and linking emails to a person as easy as the click of a button.
Daylite will ask you to manually add an email Contact for the first time, and then adds any future emails from that Contact to Daylite automatically.
In an ideal world, you always want to give each of your deals the same amount of attention. Each one of your clients should feel special, no matter how large or small the deal. However, it is important to prioritize your deals so you can focus your attention on the largest ones first.
Tracking deals by their size and likelihood to close is a powerful way to increase income and grow your business because it helps stay on top of those big deals. With Daylite, staying focused on the deals that have the biggest impact on your business is easy.
Any time a lead or client expresses interest in a product or service, you want to create an Opportunity and then add a corresponding value and probability of closing.


Copy/Paste the server, and app specific Username and Password in the correct fields


Enter the email address of your Gmail account. Daylite requires you to create an app-specific password. This is a different password than the one you use to sign into Gmail.
Log in to your Google Account and choose Manage Your Google Account
2-Step Verification Required
You must enable 2-Step Verification on your Google Account to create an app password.
If you have already enabled 2-Step Verification, click to create an App Password and proceed to Step 7.
To turn on Google 2-Step Verification:
Select Security > How you sign in to Google > 2-Step Verification. If you need more detailed instructions, follow this article from Google.
Once 2-Step Verification has been enabled, click here to create an App Password.
Enter "Daylite" as the app name, then choose Create.
Copy the App Password that has been generated and paste it into the Password field in Daylite. Click Next to finish adding your Gmail account to Daylite.
To use a Gmail account with Daylite Mail on iPadOS, certain labels need to be set to Show in IMAP. If not configured correctly, an error will be displayed when trying to sync your Gmail account.
If you are experiencing this issue, please perform the following steps below:
Log in to your Gmail account
Click the gear icon then choose Settings
Choose Forwarding and POP/IMAP and select Enable IMAP
Under Folder size limits, select Do not limit the number of messages in an IMAP folder (default):
Click Save Changes
Choose Labels select Show in IMAP for
All Mail
Sent
Spam
Open the Daylite app on iOS and tap My Mail
Your Gmail account should now sync properly with Daylite and the error should be resolved.
Choose Settings > Pipelines.
Tap on the + button to create a New Pipeline.
Tap the New Stage button to name your Stage and fill in relevant information.. You can select + Add Stage to add additional Stages to your Pipeline.
These Stages will now appear in the Opportunities Board on your iPhone.
The Opportunities Board is perfect for organizing everything in one convenient location. Each Opportunity is organized first by Pipelines, and then by Stages.
Choose Opportunities Board from the All Tab, then click the Pipeline filter to select which Pipeline you want to view. As an example, if you select the Sales Pipeline then only the Stages and Opportunities for that Pipeline will be shown.
Once you have selected your Pipeline you will notice that all previously created open Opportunities are now grouped under their respective Stages. Each Stage in the Opportunities Board shows the number of Opportunities currently in that Stage, as well as the Total Value of those Opportunities.
When creating a New Opportunity make sure you select the correct Pipeline to assign the Opportunity to.
You can set the Stage at the same time you are creating your New Opportunity.
If you do not set a Stage when creating your New Opportunity, it will automatically be placed in the Not Started Stage. This Stage is only visible when a New Opportunity is created, but has not yet been assigned to an established Stage in your Pipeline. It will disappear once you move this Opportunity to the next Stage in the Pipeline.
Dropping the Opportunity onto a Stage's title prompts an Advance Stage window that lets you verify or change the Start Date, create Tasks and Appointments, and leave Notes.
When starting to drag an Opportunity, four different states appear at the bottom of the Opportunities Board. You can select from Lost, Abandoned,Suspended or Won. If you drag and drop an Opportunity to any of these States, it will change its state and disappear from the Opportunities Board.
Daylite's Opportunities Board helps you keep track of what Stage a deal is in, whether they are awaiting a proposal, needing to be followed up on, or are ready to close.
Enter the email address of your AOL account. Daylite requires you to create an app-specific password. This is a different password than the one you use to sign into Yahoo.
2-Step Verification Required
You must enable 2-Step Verification on your AOL Account to create an app password.
If you have already enabled 2-Step Verification, proceed to Step 5.
To turn on AOL 2-Step Verification:
Log into your AOL mail account and choose Security > 2-Step Verification.
Once 2-Step Verification has been enabled, click Generate app password.
Enter "Daylite" as the app name, then choose Generate password.
Copy the App Password that has been generated and paste it into the Password field in Daylite. Click Next to finish adding your AOL account to Daylite.
You can also choose to link or unlink Items when an email is added to Daylite. This will include any Items when you send or recieve an email. You can choose to automatically link Contacts, Users, Opportunities, and Projects from all incoming and outgoing emails by navigating to Settings > Mail > Linking. This is incredibly important, because once you have checked or unchecked these boxes, Daylite will link this information to Contact records, which you can then view chronologically under Daylite's Activity View.
Whether it's an inbound or outbound phone call, it is easy to capture calls and make sure they get linked to the right person. This way you don't have to remember all the details of the phone call, such as what it was about, how long it was, and whether you called them, or they called you.
Scroll through your Contacts to find the person you need, or, as your Contact list increases in size, you can type the person's name into the Search field.
You can add a new Task to a Person or Company record by selecting either All Tasks or My Tasks in the Activity View and then tapping the + button.
Fill in the Call Details:
Call Title: An easy to remember title to reference later
Call Notes: Use the details field to capture call notes
Linked Items: Link anything related to the call
Type: Choose between Inbound and Outbound calls
Meetings, one-on-ones, and impromptu walk-ups are where some of the most important conversations happen. Make sure no one forgets what was discussed by capturing these in a Daylite Note.
Select New Note, then tap the + button to link a new Note to the Person.
With so much communication happening on a day-to-day basis, it is nearly impossible to remember every single detail of every single call or email. Capturing those details with Daylite is a simple and effective way to focus on what is important- your customers.
Select an existing Opportunity card, or select the + New Object button to create a New Opportunity record.
If you are creating a new Opportunity, select the value of the deal and the probability of it closing.
If you already have an existing Opportunity that you would like to enter or edit a value and probability for, select the Opportunity and tap Edit to add a value.
Who is going to make you the most money?
The ability to sort your Opportunities by Value means you can see at a glance which Prospects or Clients you should be focusing on.
Select either My Opportunities or All Opportunities and then tap the Sort filter.
Choose Value, and Daylite will sort your Opportunities from highest to lowest.
When you can track your deals by size, it becomes easier to prioritize which deals you should be working on next. Enter a Value or a Probability, and you can tell at a glance which deals need your attention.
Click here to learn how to Track Your Close Rate on Deals, and take your business to the next level.
A great sales process is simple to follow, repeatable, easy to teach to new employees, and can be refined over time.
Daylite helps you streamline your sales process, so everyone will know what needs to get done. You will know at a glance who is doing what, so that everyone can work towards closing bigger deals faster. Daylite gives you simple yet powerful sales tracking and streamlining tools, and it all starts as an Opportunity.
An Opportunity Pipeline allows you to define each step in your sales process and keep track of how far along each Opportunity is in the sales process.
Pipelines are the foundation of your sales process, and provide the high-level steps you need to move each lead through. Pipelines are a visual representation of the sales process, are highly customizable, and are shareable with your whole team.
Pro Tip:
If you offer a variety of products or services, you may need a separate Pipeline for each one so you can customize accordingly.
When you are creating Pipelines and Stages for the very first time, you must do so using Daylite for macOS. Once you have created these Pipelines and Stages you can then access them across all devices.
On your Mac, navigate to Daylite > Settings > Pipelines.
Select the + button to add a new Pipeline.
Name the Pipeline and add a description of when it should be used, then select either Projects or Opportunities, and make sure the Active box is selected.
You can add as many Stages as you wish to your Pipeline. Select + Add Stage, name the stage and tap Done.
Pro Tip:
If you are creating a new Pipeline that is similar to one you already have, select Duplicate Pipeline and update the new copy.
Defining the stages of your Pipeline is a great first step, but next you want to use your Pipeline to start tracking which stage each of your Opportunities are in. This way anyone can check on a new deal and see how it is progressing. Tracking stages is also helpful for creating custom Filters and Smart Lists, allowing you to report on your Opportunities. The first step is to add a new Pipeline.
Locate the Opportunity in either My Opportunities or All Opportunities, then select the Pipelines tab.
Tap Pipeline and select the Pipeline you want to use. Notice how these Pipelines match what you created using Daylite for macOS.
Once you have a Pipeline selected it's time to choose the Stage you want your Pipeline set to. Tap Stage and choose from the list you creeated on your Mac.
The current Stage and Pipeline are now displayed.
Streamlining your Opportunities and Projects can save you time; but what is the best way to do it?
The Opportunities Board and the Projects Board let you see at a glance where there may be gaps in your Pipeline process, or bottlenecks in your in Projects.
These views can help identify areas of concern, such as deals that are stuck at a particular Stage, so you can focus on moving them along.
Moving your Opportunities and Projects around between Stages has never been easier. Simply drag your Opportunity or Project from one Stage to another and drop it into place.
As you move your Opportunity from one Stage to the next, you will see four different States appear at the bottom of the Opportunities Board. They are:
Lost
Won
Abandoned
Suspended
As you begin to move your Project from one Stage to another, there are four different States that appear at the bottom of the Projects Board. These states are:
Cancelled
Deferred
Abandoned
Done
Moving your Opportunity or Project onto one of these states updates the record automatically.
For more information about how working with either the Opportunities Board or the Projects Board can help streamline your sales process, tap the links below:
With a simple-to-follow and repeatable sales process, you will close more deals. Whether a seasoned veteran or a recent hire, your sales team will have the information, expectations, and tools at their finger tips to be successful.
Want help creating the perfect sales process? who can fine-tune your business processes by implementing Daylite in your workflows.
Closing deals means making a lot of commitments, often months in advance. If you forget to follow up just once, your customer may lose confidence in you, and you run the risk of all your hard work unravelling. Creating a Task and adding a Reminder to it is the best way to make sure your commitments are followed through. No matter how long ago it was added to Daylite, you'll get a Reminder to follow up.
Daylite reminds you of your commitments no matter when they were made, so you can be confident your deals get done.
Pro Tip:
Add as many Reminders as it takes to give you peace of mind that thing's won't get forgotten.
Select My Tasks your Tabs, then select the + New Item button.
Set a Due Date for this Task.
You can set as many Reminders as you like, in order to complete the Task on time.
Now that you have a Due Date and Reminder assigned to your Task, you have peace of mind knowing that you will get notified to follow up by Daylite no matter when the Task is due.
Navigate to Settings > Tasks and tap Show in Today.
Your Tasks will now show up chronologically when you tap the Today Tab, including their Due Date, highlighted in red.
Notifications are located in the All Tab, and will show you how many reminders are waitng for you to review. Once you have tapped on Notifications in the All Menu, they will appear in your Tabs as well.
Select the Reminder to display it in the Activity View. You will be presented with the option to either:
Snooze: Snooze the reminder with pre-set time increments.
Dismiss: Remove the reminder from the notification menu.
Tasks can also appear in your Calendar, offering a visual reminder when a Task is due or deal should close.
To add Tasks to your Calendar:
Tap Calendar in either the All Tab or your existing Tabs, then select which Calendar you would like to view.
Make sure Tasks and Objectives has a check beside it.
Don't lose deals because someone forgot to follow up. Use Reminders to keep you organized, on track, and focused on your priorities. Spend your time working with potential customers so you can close more deals. Now you're ready to track all the details of your business by
Two-factor authentication (2FA) is an extra layer of security used when signing into websites or apps.With two-factor authentication enabled, you have to sign in with your username and password and provide another form of authentication that only you know or have access to. This ensures that only you can access your account, even if someone else knows your password.
You can turn on two-factor authentication for your account using these steps:
Sign into your Account Manager.
Select My Info, and then select Enable Two-Factor Authentication under the Security section.
Daylite will now ask you to either scan the QR code with your camera or authentication app, or enter a text code to obtain a verification code before continuing.
Daylite will show you a list of Recovery Codes, which you should copy or print, and store someplace safe in the event you lose or do not have access to your authentication app. Click Continue when ready.
Your authentication app will now be able to provide a verification code, which you need to enter to continue.
Two Factor Authentication has now been enabled.
Once two-factor authentication has been enabled, Daylite will require a verification code each time you log in. The process is the same on all devices.
Logging in still begins with your email and password just like before, however it is now followed by a Verification Code request. Enter the verification code from your Authentication app and tap Verify.
If you do not have access to your Verification Code you can tap Sign in with recovery code and enter one of the recovery codes you have previously written down, saved or printed.
It is important to note that once two-factor authentication is enabled, sign in will require an updated version of Daylite. Older versions of Daylite will not be able to sign into an account with two-factor authentication enabled.
However, any Mac, iPad, or iPhone that is already logged in will not need to re-authenticate.
Pro Tip:
helps save your passwords automatically, receive password suggestions, and gives you verification code integration with Daylite.
A recovery code can only be used once before it is invalidated, so you may decide to generate new ones to have on hand. You may also want to create new recovery codes if you have lost your old ones.
Sign into your account and select My Info, then tap Generate New Recovery Codes.
Tap Continue when asked to confirm. New recovery codes are generated and you are instructed to copy, print, or store them.
You can disable two-factor authentication by signing into your account and selecting My Info, then tap Disable.
You will be asked to confirm your decision to disable two factor authentication and warned that your account is more secure with two-factor authentication enabled.
A company may decide to require all users to use two-factor authentication to log in.
The company's account administrator can turn on the requirement for two-factor authentication, which means each user will need to follow the steps outlined in this article to turn on two-factor authentication for their own account.
The administrator can also see which users have enabled two-factor authentication, which is indicated with a 2FA badge on each user's row on the Users tab. The same badge will also show on the row for each device that has logged in using two-factor authentication. Note that existing devices are not forced to reauthenticate when turning on two-factor authentication, so the user would need to log out and log in again on a device for it to show the badge.
Two-factor authentication lets you enjoy peace of mind, knowing your Daylite data is protected. You are the only one who can access your account, even if someone else knows your password.
Learning to say no to a client that is asking for "just one more thing" can often be difficult. You feel like you are forced to say yes, even though your plate is already too full to handle. Maybe you say yes because you are afraid to alienate a client, but you have to balance that "yes" with the knowledge that something else may have to take a lower priority.
Daylite's Worklist gives you visual reminders of your top priorities, helping you to stay better organized.
The Worklist groups your top priorities for today in one location, making them easily viewable. It's important to be realistic about what you can do in a day, and that's why you want to keep this list focused and small. Try to limit your Worklist to a maximum of three to five Tasks. If other items come up that take priority, review your Worklist and decide which ones need to be removed. By keeping your Worklist small, you can stay focused on your day's most important Tasks.
When you select either an existing Task or create a New Task, you can add it to the Worklist by clicking the pin icon within the Task itself.
A Task that is in the Worklist will have an orange pin icon. When a Task is no longer a priority, click the pin again to remove it from your Worklist.
After you add a Task to the Worklist, you can view it immediately under the Today Tab.
When prioritizing your Tasks and focusing on the most important things becomes second nature, your ability to execute on your plans will increase exponentially. Thanks to Daylite's built in Worklist, you're able to easily see what you've committed to and which Tasks are most important.
If you have ever had to reset a forgotten password you are definitely not alone. According to a recent study, many people create and manage up to an astonishing 100 passwords. With that many passwords to juggle it's no wonder one or two might be forgotten. This is the reason that passkeys exist.
Passkeys is the new industry standard for secure sign in to your apps and websites without using a password. Daylite has adopted passkeys to give you a simple and secure way to sign in. Passkeys are stored in Apple's iCloud Keychain so they are securely available on all your Apple devices.
There are two system requirements to use passkeys:
You must update your Apple device to iOS 16 or macOS 13 Ventura.
You must enable Two Factor Authentication.
To add a passkey to your Daylite account open Safari on a device logged in to your Apple ID with iCloud Keychain turned on.
You can add a passkey using these steps:
Sign into and select My Info.
Passkeys requires you to turn on Two-Factor Authentication. This ensures your account is secure, and offers an alternative login method, using your password and verification code.
Once Two Factor Authentication has been enabled you will see Passkeys as an additional option under Security. Click Add a Passkey.
You will be prompted to save a passkey to Apple's Cloud Keychain, by first verifying your identity with Face ID, Touch ID, or your device password. Passkeys will now been enabled on all your Apple devices.
To begin using passkeys to sign into your device, you must be logged into your Apple ID with iCloud Keychain turned on.
Open Daylite and click the email field in the Log In view, then select the suggested account above the keyboard. Follow the onscreen instructions to verify your identity with Face ID, Touch ID, or device password.
You are now logged in to your account using your Passkey.
Sign in to Account Manager and select the My Info tab, then tap Disable under the Passkeys section.
If you are tired of trying to remember all your passwords, or have been forced to reset one recently, then passkeys is exactly what you need to keep your workday running smoothly.
Help keep your business data safe and set your mind at ease by turning on passkeys and T in Daylite.
Customer referrals are an excellent sign that you are doing something right. Strong relationships are one of the cornerstones of a successful business, and when you make a good impression on people you’re likely to get more referrals.
Daylite helps you build strong relationships by letting you see how many referrals your clients are sending you. Acknowledging your best referrers for the business they’ve given you encourages even more referrals, building your "book of business" through the referral process.
The easiest way to capture a referral is to create a new Contact for the referral, and then link the referrer to that Contact.
Create a new Contact for your referral by tapping the New Object button and selecting New Person.
Fill in the details for your new referral then tap add link and choose Person to select the existing Contact who referred you to the new Contact.
Select was referred by from the Relationship menu. You can set up your own custom Relationships in the Daylite Settings.
You can now see who referred your new Contact by scrolling down to People in the Details pane. Click the arrow button beside the referrer's name to view the Contact.
You'll notice that the Detail Card of the referrer Contact now also shows who they referred.
Tracking referrals can catapult your business to whole new levels, making you stand out in your client's eyes.
If tracking your referrals is important to your business, you may also want to consider engaging a Daylite Partner to help you customize reports and integration based on your specific needs.
You can to be paired with the right partner for your needs.
Hiring the right candidate for an open position can be a time consuming, and often daunting endevour. You and your candidate both have a lot riding on this process.
With Daylite, you can track all your candidates, keep your correspondence in one place, and even streamline your onboarding process.
Tracking and screening candidates can be hard. You may be receiving emails from candidates sourced from multiple job posting websites, each with their own resume. It's a lot to track. If you’re hiring for multiple positions, sorting everyone out can seem impossible.
Fortunately, with Daylite, you can easily manage and track your candidates.
Add your Outlook account to Daylite for the iPhone.
Tap Mail on the toolbar
Tap Add Account
Next, select Outlook.com from the list of account types.
Add your Yahoo account to Daylite for the iPhone.
Tap Mail on the toolbar and select Add Account
Next, select Yahoo from the list of account types.


Trash


Most candidates applying to the position will come from your email inbox. You can capture those new candidates, link their resume, and create a Task or Time Block to review their information right from Daylite Mail.
To add a new candidate to Daylite:
Select the candidate's email with the resume attached and tap Add to Daylite.
Assign any Tasks that need to occur during the hiring process.
Choose Candidate from the Category menu. You may need to create this Category by navigating to Settings > Categories.
Pro Tip:
You can also use Keywords to tag Contacts with additional information.
Add Keywords for each job posting, the source of the job posting, if you're interested in inverviewing them, etc.
Now it’s time to review your candidates. With Daylite, you can create a list of each of the candidates, and quickly locate all their information.
First, you need to create a list of all your candidates. To do this, select People and choose the Filter icon. Next, select Category to filter your possible job hires.
Choose Candidate from the Category list.
Your Candidates are now displayed in alphabetical order, along with their Details and any Activity associated with the Contact card.
You can review the Candidate's contact information, linked resume, any Notes that have been recorded, and check off Tasks as they have been completed, all with the end goal of moving the Candidate along in the hiring process.
After you’ve done the initial screening, remember to add the Keyword "Rejected" or "Passed Screening" on their Contact card.
Now that you have candidates you’ve passed on, and others you want to want to interview, you can follow up with each of them. To do that, modify your filter and add the Keywords “Rejected” to create a list of those you’ve moved on from, and adding the Keyword “Passed Screening” for those you want to interview.
You may need to create these Keywords by navigating to Settings > Keywords.
Once you have your list, select a Person, and then click on their email address to send a reply.
Now it's time to hold interviews.
Start by booking a meeting with each candidate, and be sure to invite anyone on your team who should be there.
Select your candidate annd choose the Activity View, then tap Appointments.
Set the Category to Interview.
Invite the candidate, as well as other members of your team who may be part of the decision process.
After due consideration, you have decided who you want to hire. Once they accept your offer it’s time to get them onboarded. Daylite helps with the onboarding process by keeping all their data in one place.
Select any emails you have sent the new hire with onboarding documentation, then tap Add to Daylite. This will then change to an orange coloured In Daylite, complete with a little orange sun. The email, including documentation, will be viewable chronologically under the New Hire's Activity View.
Create an all day appointment to document their start date, and link anyone who needs to know about it.
Link the new hire's Contact record to your Company in Daylite.
Choose your Company record and scroll down to Linked Items and select + add link.
Choose the new hire's Contact record.
Now that you've gone through the process of hiring and onboarding a new employee, let's start Delegating Tasks to other members of your team.
Enter the email address of your Office 365 account.
Microsoft will ask if you are trying to sign into Daylite. Select Continue.
Choose a Description and Name for your account to identify it, then click Save.
2-Step Verification Required
You must enable 2-Step Verification on your Yahoo Account to create an app password.
If you have already enabled 2-Step Verification, proceed to Step 5.
To turn on Yahoo 2-Step Verification:
Log into your Yahoo mail account and choose Security > 2-Step Verification. If you need more detailed instructions, follow this article from Yahoo.
Once 2-Step Verification has been enabled, click Generate and manage app passwords.
Enter "Daylite" as the app name, then choose Generate password.

Every single author will tell you the first page is always the most difficult. It's a blank slate, just waiting for you to fill. It can be scary, but it can also be exhilarating. Starting a new Project might feel the same way at first, but Daylite makes it easy.
Whether deliverables for customers or internal initiatives, Daylite helps you execute on your plans by keeping everything in one place.
There are a few different ways you can create a new Project in Daylite, depending on where you are in the app.
First let's look at different ways you can start creating a Project, and then we will walk through filling in the details and look at what you can customize.
The first way to start a new Project is to select either My Projects or All Projects from your Tabs.
Select the + button, otherwise known as the New Item button.
You can create a Project from a new or existing Contact. For example, if you were on the phone with a client and wanted to create a new Project for them, this would link the new Project to the Contact.
Choose People from your Tabs and select an exisitng Contact.
Select the Details View, then scroll down to + Add Link.
Select Project from the Link To menu.
Email is one of the most common ways a Project starts. It allows you to capture new Projects straight from your inbox, and link the relevant email so you can reference it later from the Project Activity.
If you would like to add an email Contact to Daylite, tap Add to Daylite. This will then change to In Daylite, which indicates that the current email Contact has been successfully added to Daylite.
Tap + Add Link and select Project. Fill in the details of the Project and save it. The Project is now linked to this Contact record, and a small hammer icon appears next to the Project. You an view the details of the Project by tapping on it.
Daylite gives you a lot of fields for your Projects. Just remember, you don't have to fill them all at once. Take your time, and fill in only the fields you have the information for. As your Project takes shape, you can fill in more and more details.
Use the information you have now, and as you improve your processes, start using the different fields as needed.
Every Project should have a name, start date, and due date, as well as a description of the Project in the details field.
You can enter a Keyword and Categories for your Project.
Assign a Pipeline so it shows up in the Projects Board.
Once you have the basics down, it is time to classify the Project. Classifying your Projects is where Daylite sets itself apart. With and , you can sort, filter, and segment your Projects to learn what kinds of Projects you are managing the most, and determine how to increase your productivity. With you can quickly identify who on your team is responsible for what, and who you should speaking with at a company.
A Category is the top-level classification. A Project has only one Category, so think about how you want to organize your Projects.
Here are a few examples of how you can categorize your Projects:
Product or service
Personal Coaching
Group Training
Speaking Event
Keywords are a more flexible way to classify your Projects. A Project can have as many Keywords as you want, so you can use them for multiple reasons. To add Keywords click on the + button next to Keywords and type the Keyword you want to add.
Here are a few examples of how you can use Keywords to classify your Projects:
Objectives
Website Revamp
Customer Acquisition
Increasing Customer Satisfaction
By assigning a Role and a Relationship to the People or Companies associated with your Project, you can ensure that when it comes time to reach out, you know you are talking to the right person.
To set up Roles and Relationships that are relevant to you, navigate to Settings > Roles and Relationships. You can set up a Person Role, a Company Role, and Relationships.
With all the details about a Project now in one place, your team has the tools to execute your plans and take your business further.
The world is a busy place.
We're always on the go, pressed for time; and even though we know our memories are far from perfect, we don't always stop and write things down. Remembering your client's birthday, or their favourite team sport for example, can be the difference between getting the sale and losing a valuable customer.
That’s why, no matter where you go, you can capture new Contacts quickly in Daylite.
The easiest way to capture a new Contact is to use the New Item button.
You can capture either a new Person or a new Company by selecting the
For some businesses, capturing new leads means writing names on a whiteboard, while others use spreadsheets or even scraps of paper. If you truly want to grow your business, you need to have a better system to remember all those details for you.
Daylite gives you an entire tool box to do exactly that. Tracking your leads, organizing all the moving pieces, and streamlining your sales process begins by capturing new business in Daylite.
Regardless of which device you use to capture new business, Daylite is right there to help keep you organized. Enter a Contact's information on one device, and instantly access it from another. It really is that easy.
Whether you are at a business meeting, a trade show, or just having a conversation in an elevator, the Contacts and Opportunities you create while on the go will sync with your other Daylite devices, so you always have the most up to date information.
For a Project to run efficiently, and be completed on time, everyone needs to know what is expected of them, who is involved in the Project, and the timeline. You can track progress, organize your Tasks, and improve your efficiency by using Daylite to streamline your Projects. Improve your workflow by having everything in one place, a simplified process, and a team that understands what's expected of them.
Pipelines help you visually track which Stage each Project is in, or act as a guide to make sure you or your team are following each step in order.
Focus on the right things at the right time by defining each Stage of your Project. By building Pipelines for your Projects, you can ensure your process is completed in the right order.
It can be tough letting go of the reins, trusting that the project you worked so hard on is safe in somebody else's hands. Learning to delegate is an important skillset, especially if you are a manager.
With Daylite, you can delegate Tasks while still maintaining oversight on the entire project.
When creating the Task, follow the steps below to delegate it to someone else:
You can delegate this Project to others by clicking the Delegate button.
Set the Owner of the Project. By default this will show whoever is currently signed in.
Set Permissions so only certain members of your team or company can access information.
If you need to capture more information, click Add Field near the bottom of the Project card and add the field you need.
Be sure to link People and Companies to the Project by tapping Linked Items.
If you need to capture more information, click add field at the bottom of the project card and add the field you need.
Is this for you or a customer?
Internal
External
Who owns the Project?
Marketing
Human Resources
Executive team
Type of Client
Referral
Big Contract
Family/Friend
Additional service or product options
Additional Photographer
2-week coaching session
2 bedroom


Daylite gives you a lot of contact fields, but don't panic. You don't have to use them all.
Gather the information you need today, and as your relationships grow you can edit existing fields, or add entirely new ones.
Fill in the appropriate Contact fields. Tap Save when finished.
Contacts you capture while on the go will sync with your other Daylite devices, so you always have the most up to date information.Daylite Mail lets you add new Contacts straight from your inbox, while also linking them to the email.
You can add New Task or New Appointment to a Contact's record, and link the email sender to another Person, Company, Project or an Opportunity.
All of these are now a part of Daylite, and can be found listed chronologically in the Activity View.
To begin, select the email and tap Add to Daylite.
This sender has now been added to Daylite as a Contact, and this email will be linked to their Contact record, and can be seen in the Contact's Activity View.
Once you have added this Contact to Daylite, you can then link additional information such as People, Companies, Projects and Opportunities, Tasks, Appointments and more.
Be sure to add Categories and Keywords to your Contact records. By doing so, you make filtering and sorting that much easier, which helps you stay organized.
Categories are the top-level contact classification. A Contact can only have one Category, so when classifying a Contact, consider who they are in relation to you and the business.
Navigate to Settings > Categories to add a new Category or edit an existing one.
Here are a few examples of how you can categorize your Contacts.
Where they are in your sales funnel
Prospect
Lead
Customer
Business relationship
Supplier
Vendor
Coach
Employee
Personal contacts
Family
Friends
Keywords are more flexible than Categories. A Contact can have as many Keywords as you want, so feel free to use them for as many reasons as you need. Tap the Edit button in the Contact's record, select Keyword, then either choose an existing Keyword from the list or tap New Keyword to create one. You can also do this from the Settings menu.
Here are a few examples of how you can use Keywords to classify your Contacts:
Type of lead
Cold
Hot
Source
Trade Show 2018
Referral
Buyer preference
2 Bedroom House
Monthly Coaching Sessions
Wedding Package 2
You'll rarely meet someone who isn't involved with another company or knows someone else in your network. When you link People and Companies together, you can choose Roles within a Company, and Relationships between people.
Now you can always make sure you're speaking to the right person at a Company, track referrals, and see how your network grows.
When you link a Person to a Company, you can choose what their Role is. This helps by documenting who does what in a Company. That way, when you call or email a Company, you can be sure you're reaching the right people. You can also do things like build an entire campaign targeting specific Roles, such as coaching for C-level executives.
When you link a Person to another Person, you can choose their Relationship. This is helpful when working with multiple people in a family, tracking referrals or business partners.
Keep the details straight when you capture new Contacts in Daylite.
More than just a contact manager, Daylite gives you powerful classification tools to track Categories, assign Keywords, as well as define Roles and Relationships. Remember it all, and action it in ways you never could before.
Pro Tip:
Create a New Contact and a New Opportunity at the same time. This way you have a chronological record of link one to the other, and fill in additional information.
Let's start by first creating a New Person Contact.
Select People from the Tabs.
Tap the + button to create a New Person.
Fill in all the information you have for this Contact, then tap Save. Don't worry, you can always edit this Contact later on, with additional information as you collect it.
Next, we are going to create a New Opportunity and link it to your Contact.
Start by locating your new Contact, and tapping + Add Link.
Next, select Opportunity from the Link To menu.
Finally, you can either link to an existing Opportunity, or tap the + button to create a brand new Opportunity for your new Contact.
The Opportunity you just created is now linked to your Contact.
Whether responding to a marketing email or online form, or after handing out your business card, email is one of the most common ways new business starts.
Daylite lets you to capture new Contacts straight from your inbox, add the email to Daylite, and link People, Companies, Projects and Opportunities to your new Contact.
Start by adding the email to Daylite. Once added, any corrospondance between you and your Contact via email will show a small orange sun to indicate the email and any of it's threads have been added successfully. These will be viewable in Daylite's Activity View.
Next, tap on the Contact's name to add them to Daylite.
Tap Create New Person or Create New Company, depending on which you which record you would like to create. A Contact record will appear. Fill in any information you have. You can always add more to the Contact record as needed. Remember to tap Save when you are done.
As a best practice, you should always try and create a New Opportunity whenever you capture a Contact from an email. Even if there is very little information to start, you want to be ready when that initial email inquiry becomes a full blown Opportunity.
Now that the Contact has been added to Daylite, tap on their name to create a New Opportunity.
Next, tap the + Add Link button.
Choose Opportunity from the Link To menu.
Select the + button to fill out the New Opportunity record, or select an existing Opportunity.
As you can see, the Opportunity you just created is now linked to your Contact's record.
Daylite gives you a lot of fields to fill out. Don't worry though, you don't have to use them all. Gather the information you need today and as you learn more, or update your sales process, you may decide to fill in additional fields at a later date.
Every Opportunity should at the very least have the Name, Start Date, and Details filled in. You may also want to add a Forecasted Close Date as a guide for when you expect the deal to close, as well as the Opportunity's total Value.
Be sure to link any People or Companies that are relevant to the Opportunity.
Once you have the basics down, it's time to classify the Opportunity. Classifying your Opportunities is where Daylite sets itself apart. With Categories and Keywords, you can sort, filter, and segment your Opportunities.
A Category is the top-level classification in Daylite. An Opportunity only has one Category, so think about how you want to organize your Opportunities.
If you need to edit your Categories to fit your business needs, navigate to Settings > Categories and tap the + button to create a customized Category.
Here are a few examples of how you can categorize your Opportunities.
Products or services your leads are interested in buying
Personal Coaching
Group Training
Speaking Event
Types of leads
Hot
Cold
Sources for your leads
Email Marketing
Trade Show 2024
Keywords are a more flexible way to classify your Opportunities. An Opportunity can have as many Keywords as you want, so you can use them for multiple reasons.
You can add new Keywords to the Opportunity Card directly, and apply them to People, Companies, Projects, Opportunities, Tasks, Appointments, Notes, Emails, and Forms.
Here are a few examples of how you can use Keywords to classify your Opportunities:
Type of client
VIP
Repeat customer
Family/Friend
Buying preferences
Additional Photographer
2 Week coaching session
2 bedroom
Specific marketing campaigns
10% off referral
re-targeting ads
holiday landing page
When linking people to an Opportunity, you could begin by adding members of your team, like the lead salesperson or account manager, then add your customers.
Now that you've added all the essential details, classified your Opportunities, and added everyone's roles, go ahead and save your Opportunity.
With all the details about an Opportunity captured in one place, your Team now has the tools to close more deals and take your business further.
Did you know?
Pipelines and Stages must be set up using an iMac or MacBook before viewing them on your other devices.
Navigate to Daylite > Preferences > Pipelines.
Select New Pipeline and fill in the Name, Description, and select Applies to Projects.
Fill in New Stage details.
You may add additional stages by clicking the Add Stage button.
In the following example you can see:
A list of Pipelines.
Tasks lists created for each Stage in a Pipeline.
Details of the selected Task.
You can now view your newly created Pipelines and Stages by selecting My Projects or All Projects from Tabs.
Whether creating a New Project or viewing an existing one, you will see the Pipelines and Stages are exactly the same as what you created on your iMac or MacBook.
You can see at a glance which Pipeline and Stage your Project is currently at, as well as Tasks, Appointments, Emails etc, that have been linked to this Project.
Projects with better visibility finish on time. Track the progress of Projects and meet your deadlines with streamlined processes.
The Projects Board lets you see at a glance where there may be bottlenecks in your currently in-progress Projects. This view can help identify areas of concern, such as Projects that are stuck at a particular Stage, so you can focus on moving them along.
You can also build Project lists using Filters, which separate the data and show you only what you need to see. For example, you could:
Filter by the Status of the Project - follow up on Abandoned or Deferred Projects.
Filter by a single Category or multiple Keywords.
Streamline your Projects with documented processes, keeping everything in one place. Track your progress, improve your efficiency, and set the right expectations with your team in Daylite.
Would you like more information on Using The Projects Board, or Starting a New Project?
Do you need some assistance coming up the perfect Project workflow? One of our Daylite Experts can help fine-tune your business processes by implementing Daylite in your workflows.
Tap delegate to user and then select a user.
Select the checkbox labelled Notify Changes.
Click Save.
Now, when an assigned Task is updated you will receive a notification in Daylite on your Mac, iPhone, and iPad with a push notification.
Pro Tip:
When delegating a Task, assign a due date on your Tasks so everyone knows what they need to do, and when the Task is due.
Delegating action items from an email is critical to focusing on the biggest picture and getting control of your inbox. Daylite allows you to link an email to a Task, and delegate it straight from your inbox so you can move on to the next issue.
Select the email you wish to delegate and tap Add to Daylite. It will turn to an orange with a small sun icon and say In Daylite.
Tap the New Task button.
In the New Task pop up tap delegate to user, then choose the person you want to delegate this Task to.
Select Notify Changes, and click Delegate.
The Delegated Task List contains all Tasks currently assigned to you delegated to others. These Tasks can be filtered, and marked as Done when the Task is completed.
Select the Delegated Task List from your Tabs.
Tap on the Task to view it's details.
You can filter Tasks by the Owner, Category, Keyword, Status of the Task, and it's Priority.
Delegating is undoubtably one of the hardest things you may ever do, especially if you feel invested in the Project. Daylite helps you delegate those special Projects to your team, and gives you the oversight to maintain control of your business.
The Opportunities Board lets you visually track how many Opportunities are in your Sales Pipeline, see where each of your Opportunities are in the process, and helps you easily prioritize your most urgent or valuable Opportunities first.
The Opportunities Board offers an overview of how your open Opportunities are moving through each Pipeline, and helps you identify which ones you should focus on.
The Opportunities Board is located under Opportunities in the All Tab.
It is comprised of:
The Pipeline Filter.
The Opportunities and Total Value Count.
Sort and View Options.
Filters.
Stages.
Opportunities.
The Opportunities Board lets you see at a glance where there may be gaps in your current Pipeline process. This view can help identify areas of concern, such as deals that are stuck at a particular stage, so you can focus on moving them along.
In the example above, there is only one Opportunity under Not Started, meaning this may be an area you want to focus on to increase the number of Opportunities in this Pipeline.
The Opportunities Board can show only one Pipeline at a time, since the Stages for each Pipeline are different.
Select the Pipeline you would like to view by clicking the Pipeline filter.
The Opportunities Board is tied directly to the Pipelines you create in Daylite Preferences.
These Pipelines can only be created and edited from Daylite for Mac.
In Daylite for Mac, navigate to Settings > Pipelines.
Select the + button to enter Pipeline information.
Select New Stage to create a Pipeline Stage.
Choose + Add Stage to create additional Stages.
Select New task to create a Task that needs to be completed for each Stage.
Select New appointment to create an Appointment that needs to be completed for each Stage.
Select due and set the date to either after the stage starts, or before it ends.
After setting up your Pipelines on your Mac, select the Opportunity Board from the All Tab on your iOS device.
The Pipelines and Stages will match what you have set up in the Preferences menu.
An Opportunity must have a Pipeline assigned for it to be included in the Opportunities Board view.
There are two ways to do this.
The first is to set the Pipeline and Stage when you are creating a brand new Opportunity.
The second way to assign a Pipeline and Stage is from the Opportunities Board itself.
Begin by navigating to the Opportunities Board and select an Opportunity you would like to assign a Pipeline and Stage to.
You can see the total number of Opportunities you have in the selected Pipeline, as well as their combined total value here.
You can move your Opportunities to the next Stage in your Pipeline by dragging them from one Stage to the next.
Dropping the Opportunity onto a Stage's title prompts an Advance Stage window that lets you verify or change the Start Date, create Tasks and Appointments, and leave Notes.
The Opportunities Board only shows Opportunities that are in an Open state. Opportunities in any other State will not be shown here, but are viewable in the Sidebar under All Opportunities. That is also why Opportunities disappear from the Opportunities Board when you change the State to Lost or Abandoned for example.
As you begin to move your Opportunity from one Stage to another, there are four different States that appear at the bottom of the Opportunities Board. These States are:
Lost
Abandoned
Suspended
Won
Dropping an Opportunity onto any of these States prompts a window at the bottom of the Board to appear, which lets you verify or change the State as well as select a reason.
The State is automatically updated in the Details and Activity View.
Using filters is a great way to narrow your search and find what you are looking for quickly.
The Opportunities Board lets you filter by:
Owner - This option filters Opportunities by individual Owner, or view All Owners at one time.
Forecasted Close Dates - This option filters Opportunities by the date the deal should close by. You can look at forecasted close dates up to a year, both past and future.
Create Dates - This option filters Opportunities by the date the Opportunity was created, up to a year, both past and future.
Category - This option filters Opportunities by Categories, which can be designated in Daylite Preferences.
View Options allows you to hide or show certain information from an Opportunity's card, to help you focus on what is most important to you.
You can change how you view Opportunities by clicking ↑↓ Sort and choosing from the following:
Forecasted Close organizes each Opportunity in their Pipelines, so you can see when a sale is scheduled to wrap up.
Created organizes each Opportunity by the date you created it.
Name organizes your Opportunities alphabetically.
Priority organizes your Opportunities by priority.
You can view an Opportunity's Linked People and Companies here. If you would like to change these values, tap the Opportunity Card and then select edit.
You can view an Opportunity's Value and Probability of Closing here. If you would like to change these values, tap the Opportunity Card and then select edit.
If an Opportunity has an upcoming Task or Appointment a notification will appear here. Tap the Opportunity Card to either view or create Tasks and Appointments.
The Opportunities Board tells you how many days an Opportunity has been at the current Stage. This feature helps identify which Opportunities may be getting bottlenecked, and how best to move them along to the next Stage. Moving the Opportunity to the next Stage resets this number.
On a scale of 1-10, how important is this Opportunity? You can quickly view the Opportunity's Priority here. Tap the Opportunity Card and select edit to change this value.
You can quickly see who owns or is assigned to an Opportunity by looking at the bottom right side of the Opportunity Card. If applicable, a small photo of the owner will show.
The Opportunities Board offers an exciting new way to view every Opportunity at each Stage in your Pipeline.
You can view your entire Pipeline at a glance, to help identify areas of concern, focus on your top priorities, and close more deals.

The Projects Board helps you visually track how your Projects are progressing, identify the bottlenecks, and prioritize what’s most important so you can always deliver on your promises.
The Projects Board offers an overview of how your Projects are moving through each Pipeline, and helps you identify which ones you should focus on.
The Projects Board lets you see at a glance where there may be bottlenecks in your currently in-progress Projects. This view can help identify areas of concern, such as Projects that are stuck at a particular Stage, so you can focus on moving them along.
The Projects Board is located in the All Menu
Type - This option filters Opportunities by how they were acquired. You can choose to filter by Cold Calls, Trade Shows, Referrals and many more. These options can be set in Preferences.
Total Value organizes your Opportunities by their total value.
Probability organizes your Opportunities by the likelihood they will close. This percentage can be assigned to the Opportunity under Details and Activity.
Next Activity organizes your Opportunities by next scheduled Task or Appointment.
Days in Stage organizes your Opportunities by the number of days they have remained in one Stage.


It is comprised of:
The Pipeline Filter
Filters
Sort and View Options
Stages
Projects
The Projects Board is tied directly to the Pipelines you create in Daylite Preferences.
These Pipelines can only be created and edited from Daylite for Mac.
In Daylite for Mac, navigate to Settings > Pipelines.
Click the + button to enter Pipeline information. Be sure to select Projects and click Active from the Applies to section.
Click on New Stage to create a Pipeline Stage, then click + Add Stage to create additional Stages.
Select New task to create a Task that needs to be completed for each Stage.
Select New appointment to create an Appointment that needs to be completed for each Stage.
Select due and set the date to either after the stage starts, or before it ends.
After setting up your Pipelines on your Mac, select the Projects Board on your iPhone.
The Pipelines and Stages will match what you have set up in the Preferences menu.
To add a new Project to your Projects Board, begin by navigating to Projects in the All Tab..
Tap the + New Item button to create a new Project, and then select set pipeline and choose the Pipeline you want your Project to appear under.
While you are at it, you can set the Stage you want the Project to start at.
Add Activities, Tasks, a Start Date and Notes to the Project as needed.
Move your Projects to the next Stage in your Pipeline by dragging them from one Stage to the next.
Dropping the Project onto a Stage's title prompts an Advance Stage window that lets you verify or change the Start Date and leave Notes.
The Projects Board only shows Projects that have a New or In Progress status. Projects in any other status will not be shown here, but are viewable under All Projects. That is also why Projects disappear from the Projects Board when you change the Status to Cancelled, Deferred, Abandoned or Done.
As you begin to move your Project from one Stage to another, there are four different statuses that appear at the bottom of the Projects Board. These Statuses are:
Cancelled
Deferred
Abandoned
Done
Dropping a Project onto any of these statuses prompts a window at the bottom of the Board to appear, which lets you verify or change the Status.
The Projects Board can show only one Pipeline at a time, since the Stages for each Pipeline are different.
You can choose to filter your Project by:
Owner - This option filters Projects by the Owner or assignee. You can filter by individual Owner, or view All Owners at one time.
Due Date - This option filters Projects by due date. You can look at due dates up to a year, both past and future.
Create Date - This option filters Projects by the date the Project was created, up to a year, both past and future.
Category - This option filters Projects by Categories, which can be designated in Daylite Preferences.
Keywords - This option filters Projects by Keywords, which can also be designated in Daylite Preferences.
You can change how you view Projects by clicking ↑↓ and choosing from the following:
Due Date organizes each Project by due date.
Created organizes each Project by the date you created it.
Name organizes your Projects alphabetically.
Priority organizes your Projects by priority.
Next Activity organizes your Projects by next scheduled Task or Appointment.
Days in Stage organizes your Projects by the number of days they have remained in one Stage.
View Options allow you to hide or show certain information from a Project's card, to help you focus on what is most important to you.
You can view an Project's Linked People and Companies here:
A Project's Next Activity will appear here:
If a Project has a Due Date it will appear here:
The Projects Board tells you how many days an Project has been at the current Stage. This feature helps identify which Project may be getting bottlenecked, and how best to move them along to the next Stage. Moving the Project to the next Stage resets this number.
On a scale of 1-10, how important is this Project? You can quickly view the Project's Priority here:
You can quickly see who owns or is assigned to a Project by looking at the bottom right side of the Project Card. If applicable, a small photo of the Owner will show.
The Projects Board offers an exciting new way to view every project in each of your Pipelines.
You can view your entire Projects Pipeline at a glance, to help identify areas of concern, focus on your top priorities, and deliver on your promises.
Do you need some assistance coming up the perfect Project workflow?
One of our Daylite Experts can help fine-tune your business processes by implementing Daylite in your workflows.